5 natural stones that can elevate your home’s design

2023-09-25T08:01:00

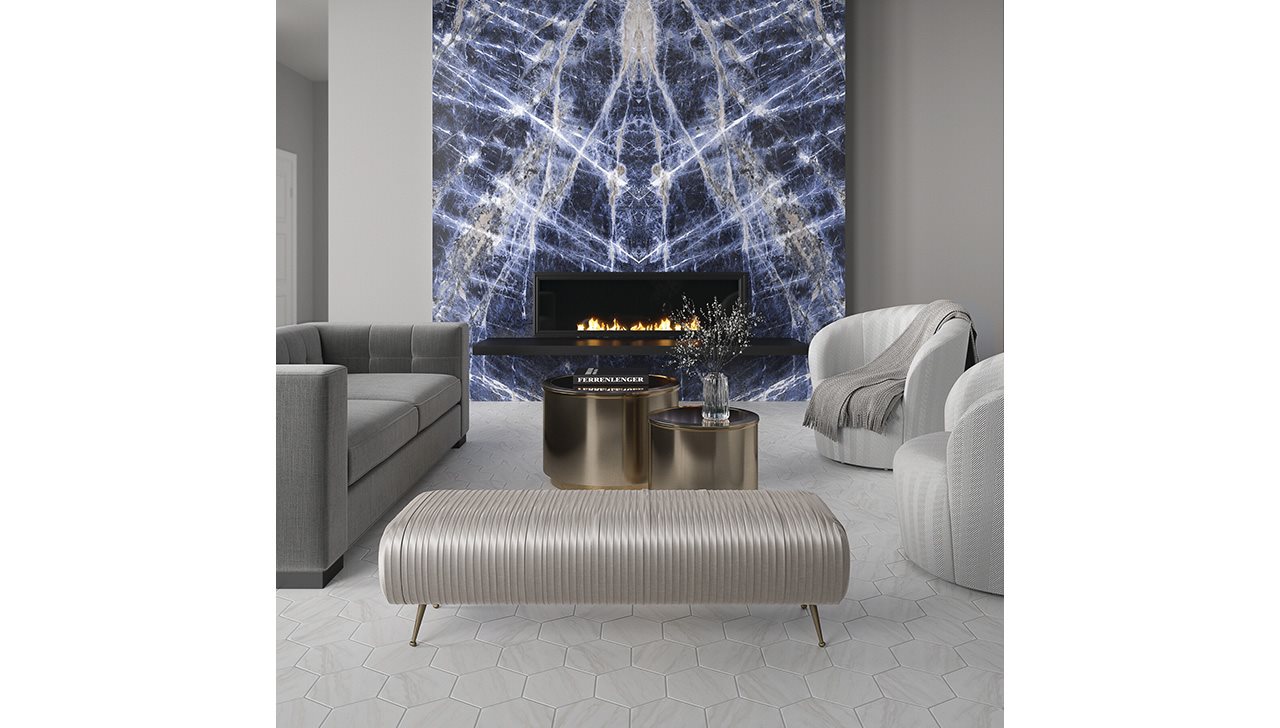
(BPT) – Industry trends come and go, but one material has withstood the test of time: natural stone. It’s a popular choice for eager designers and consumers. From the rich, Renaissance look of marble to the darker rustic tones of slate flooring, the beauty of stone is varied and versatile enough to fit in with any style of design, including contemporary decor.

Natural stone is inherently beautiful. Because of each stone’s varying composition and minerals, it can create depth, unique movement, natural variation, reflective qualities and colors you can’t get with any other material. Natural stone’s beauty is enhanced through careful cutting that offers a radiant effect. Each and every cut of stone is slightly different, guaranteeing that surfaces crafted from natural stone are one of a kind.

Daltile, one of America’s leading natural stone providers, offers many natural stone options to suit your specific taste and vision. Check out the company’s top five natural stone choices that are solid options for new home constructions and renovations.
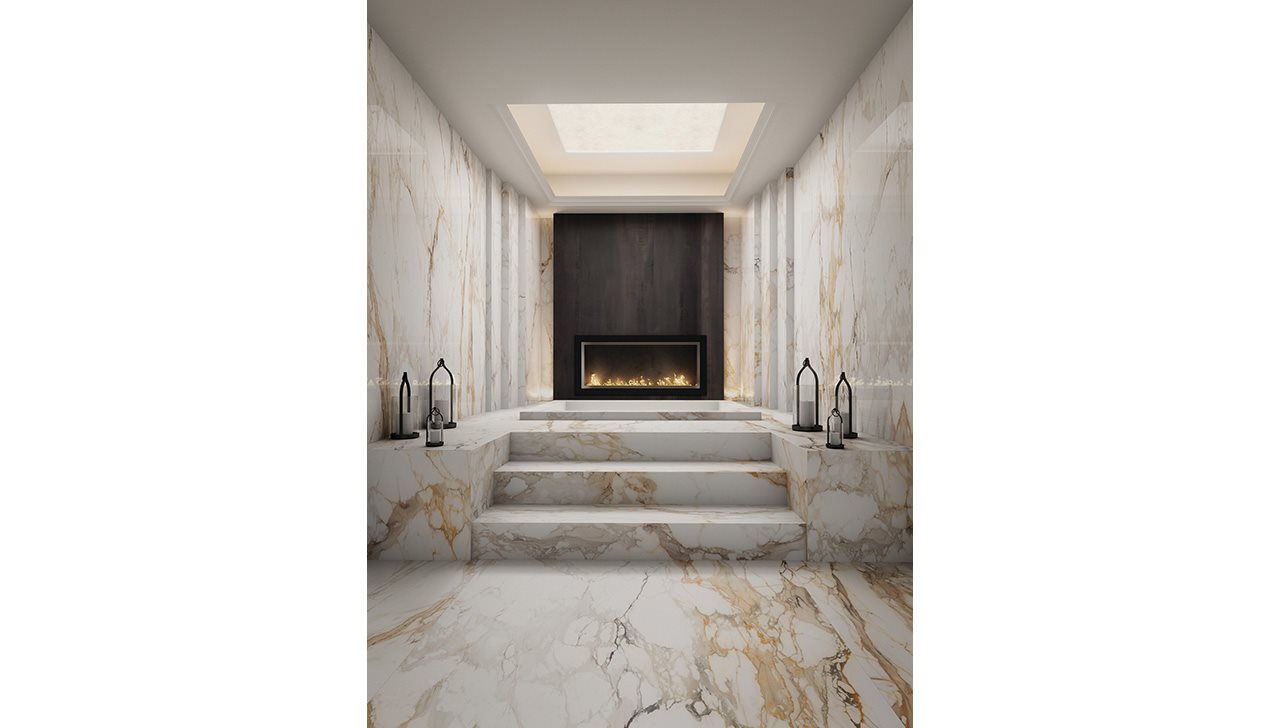
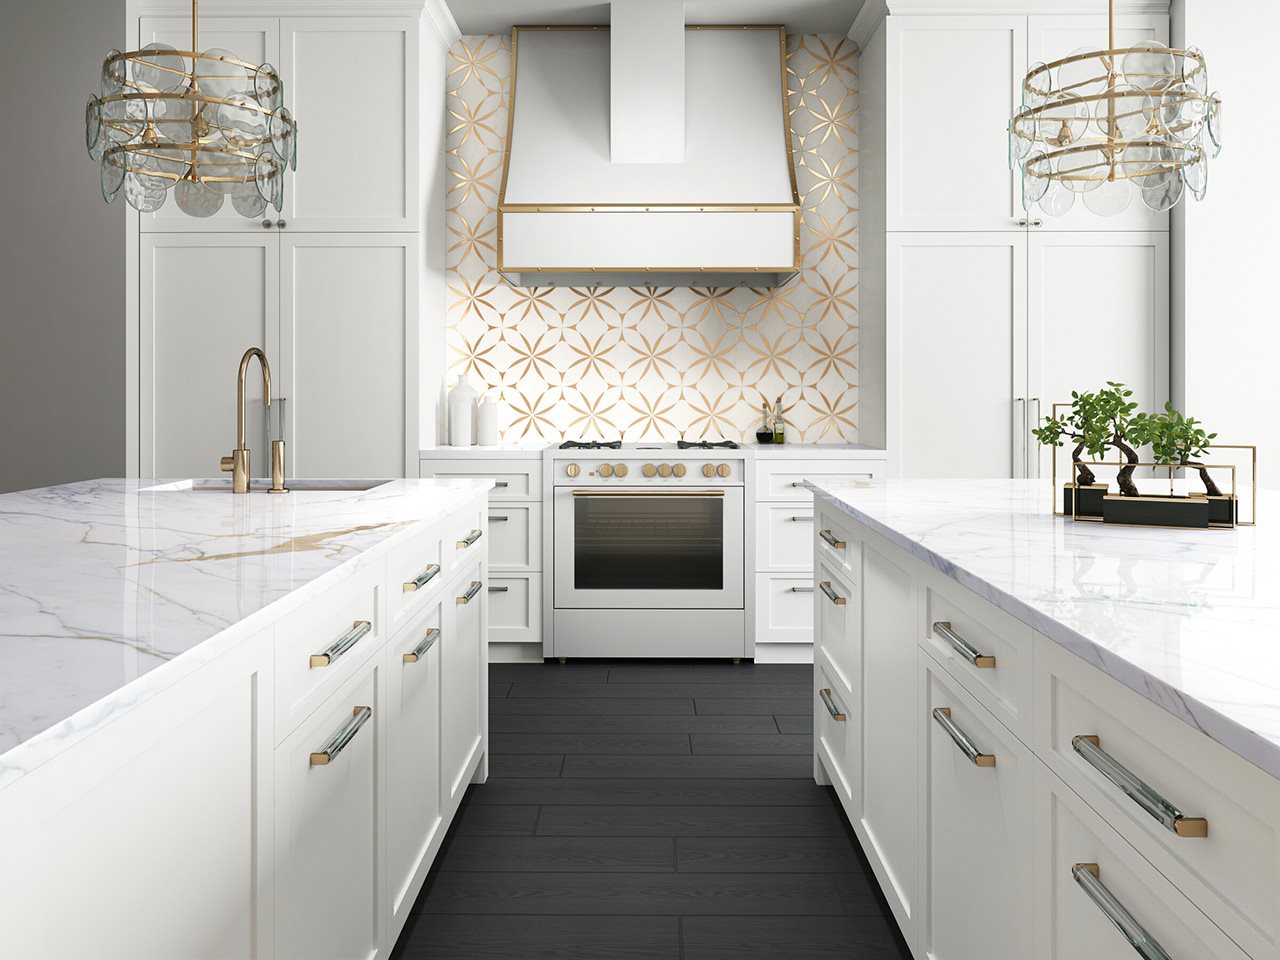
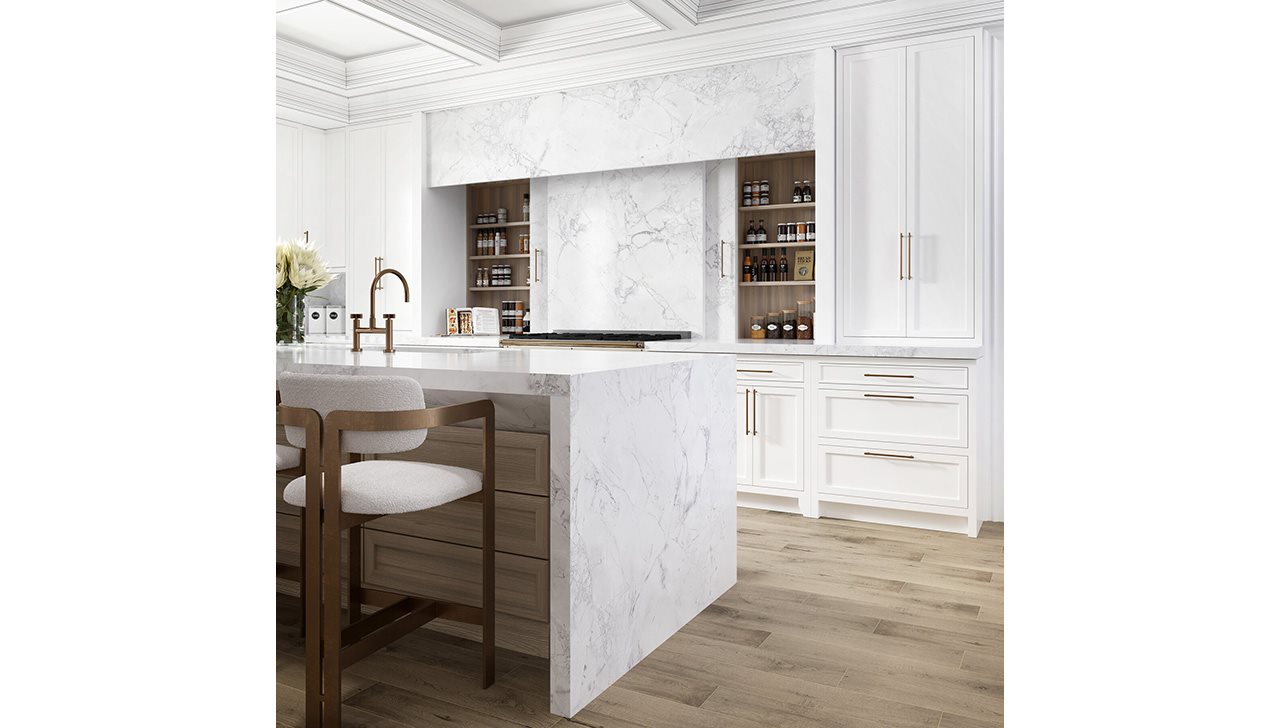
1. Marble

Nothing speaks sophistication and luxury like marble. All the way back to the Greeks and Romans through the Renaissance, the most important monuments and sculptures have always been created with marble. Choosing marble tiles for backsplashes, countertops, flooring and more, you’re investing in a timeless material that will add a lavish feel to your abode.

Marble tile is known for its attractive veining. Also, it comes in an array of shades and designs to suit any decor. New color options make marble an appealing option for homeowners looking for modern designs with timeless style.

2. Granite

It’s no surprise that granite remains a sought-after classic. It offers an upscale feel to any space. Granite’s distinctive granular appearance is a more traditional choice for those looking for a natural stone. It’s available in a vast array of colors, including deeper hues with specks of intriguing color for a more striking look.

3. Quartzite

A hot new trend in stone is natural quartzite. Natural quartzite has marble’s luxurious look and feel with greater durability and hardness. When it comes to countertops, natural quartzite continues to be the fastest-growing category in natural stone trends. Opt for natural quartzite if you’re seeking softer looks with more natural movements.
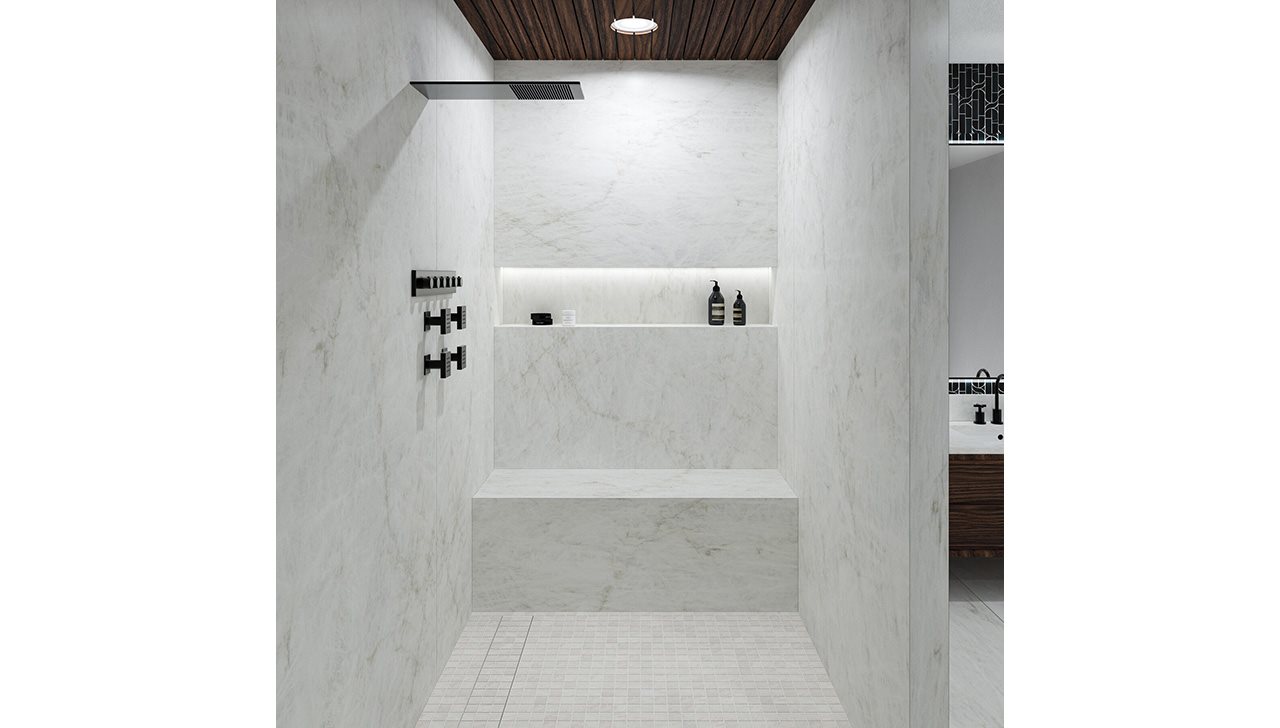
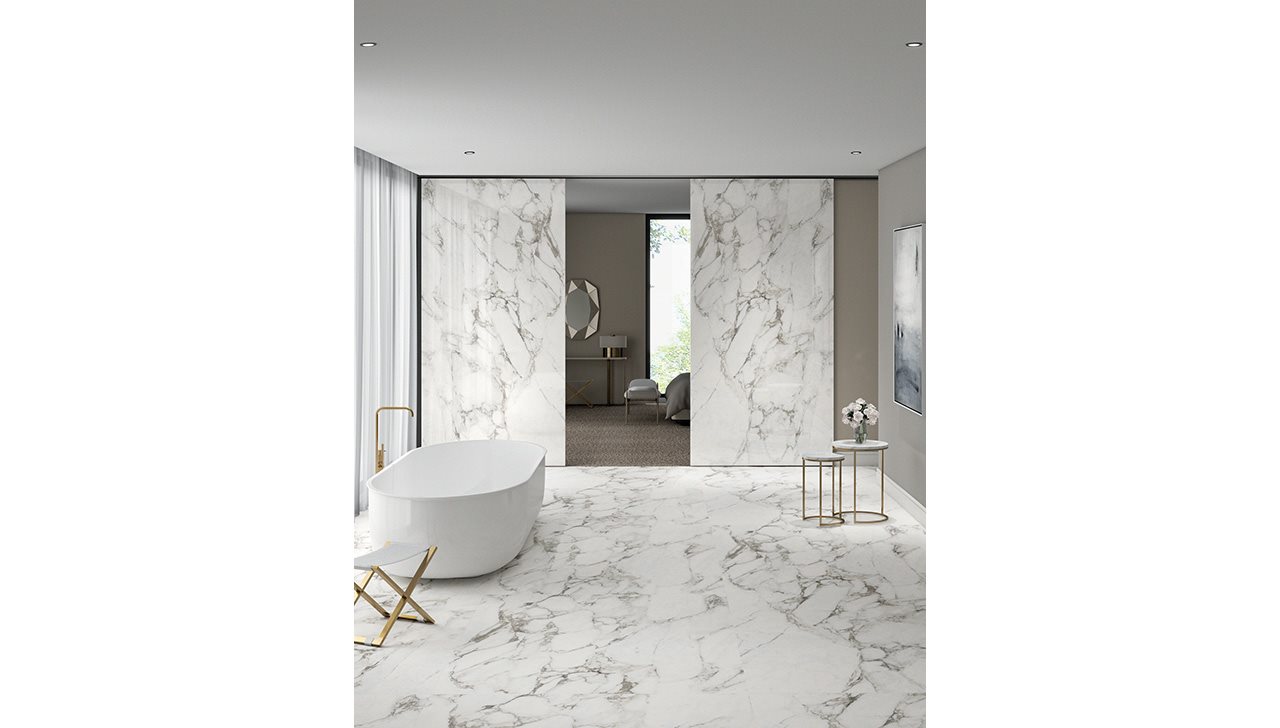
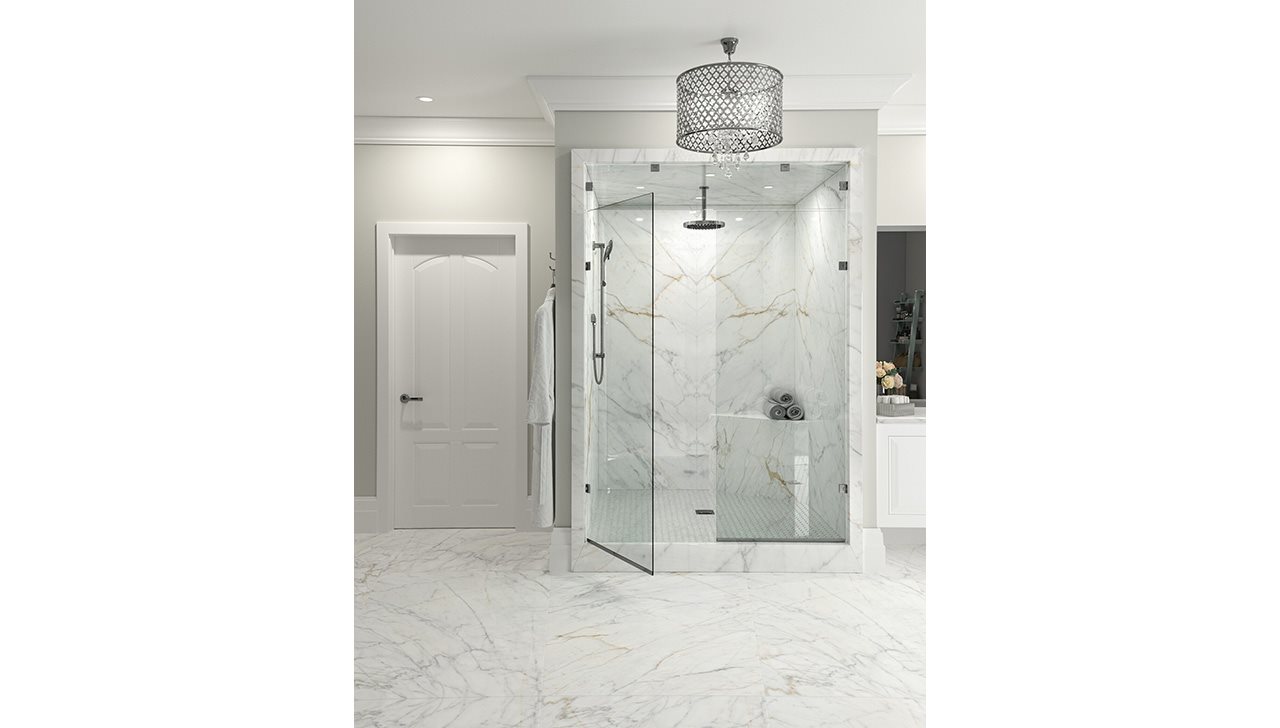
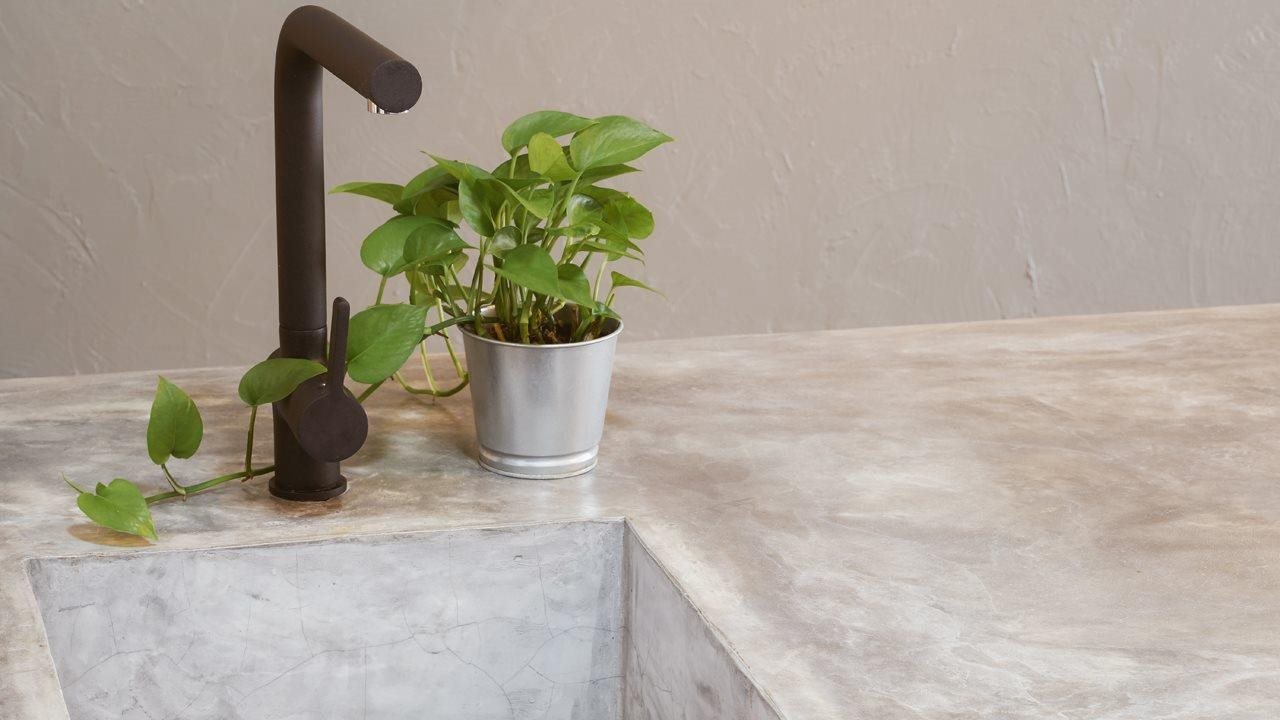
4. Limestone

Another contemporary natural stone is limestone. It lends itself well to many designs and comes in a wide spectrum of gray, white, beige and other natural tones. Limestone’s distinctive flecks and granular patterns can add an instant touch of elegance to any room. For example, adding a limestone floor lets you easily transform a simple bathroom into a luxurious, contemporary at-home spa.
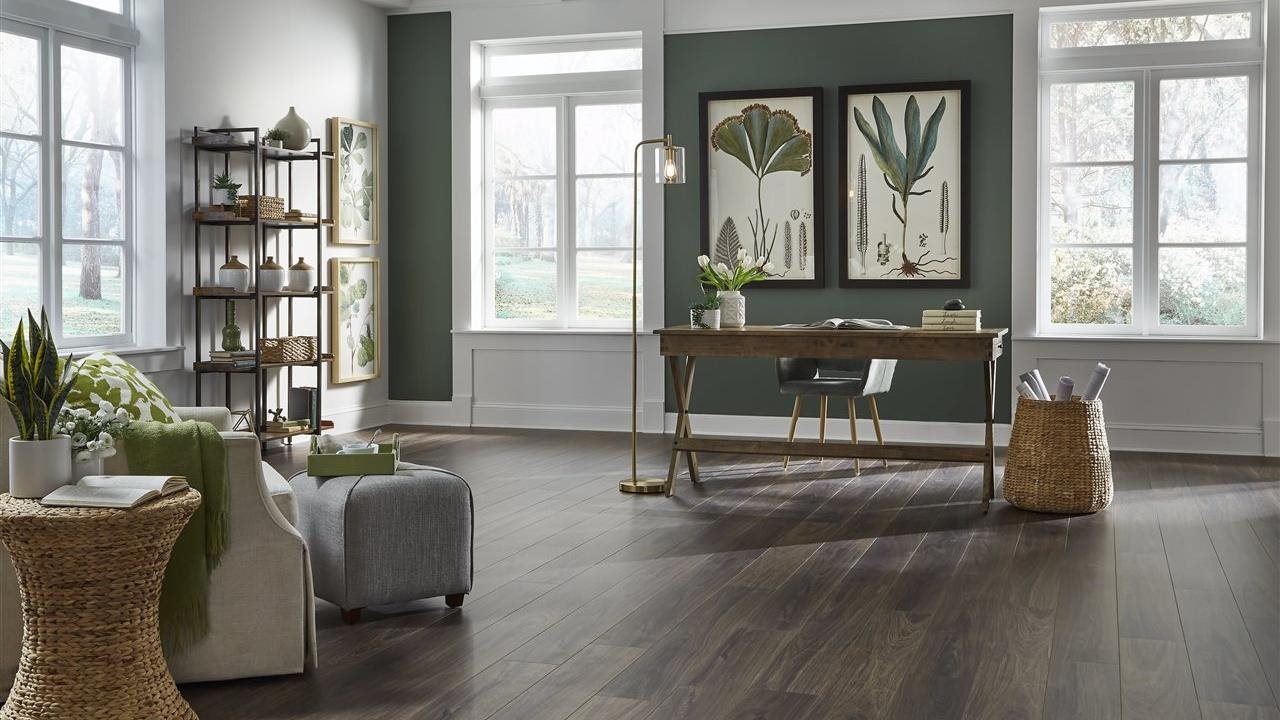
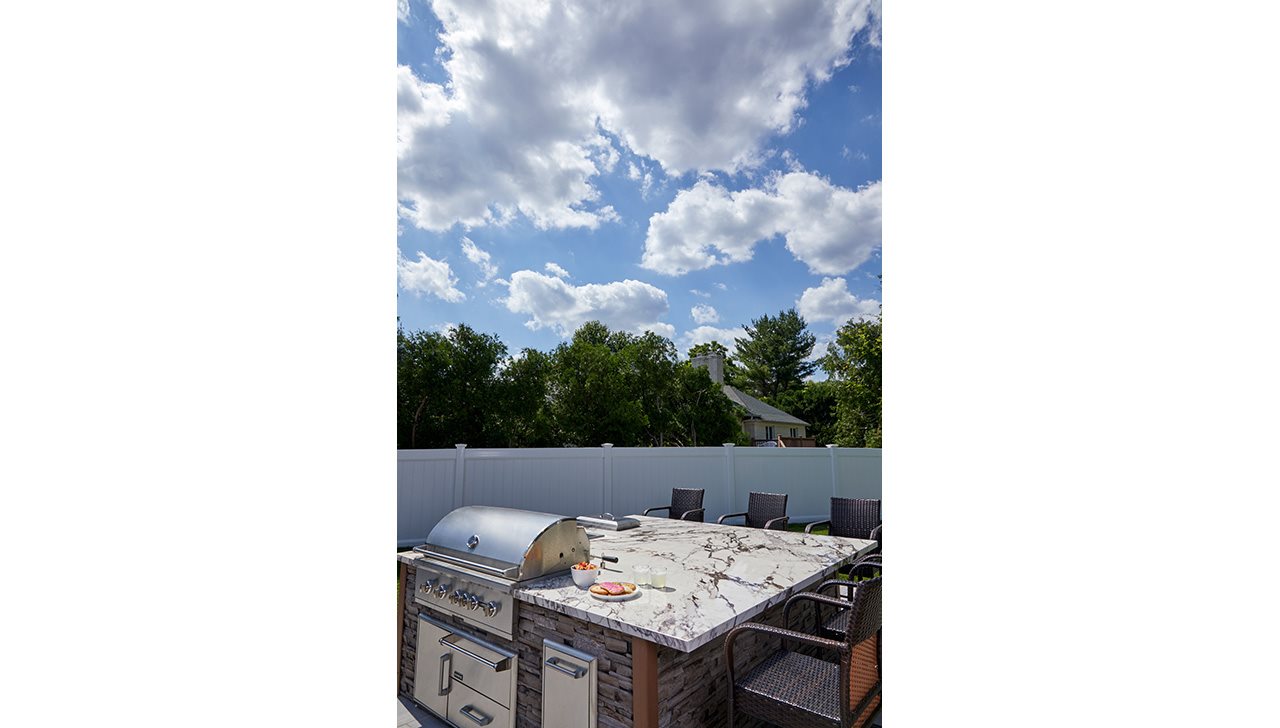
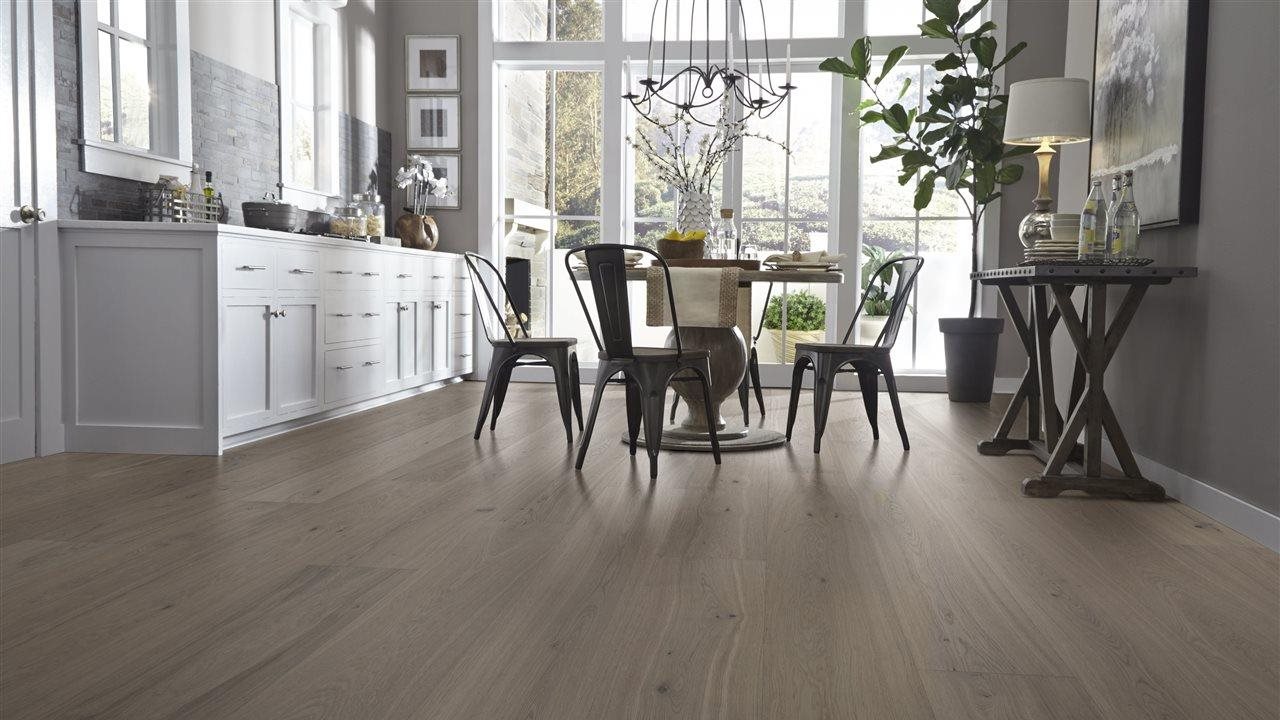
5. Slate

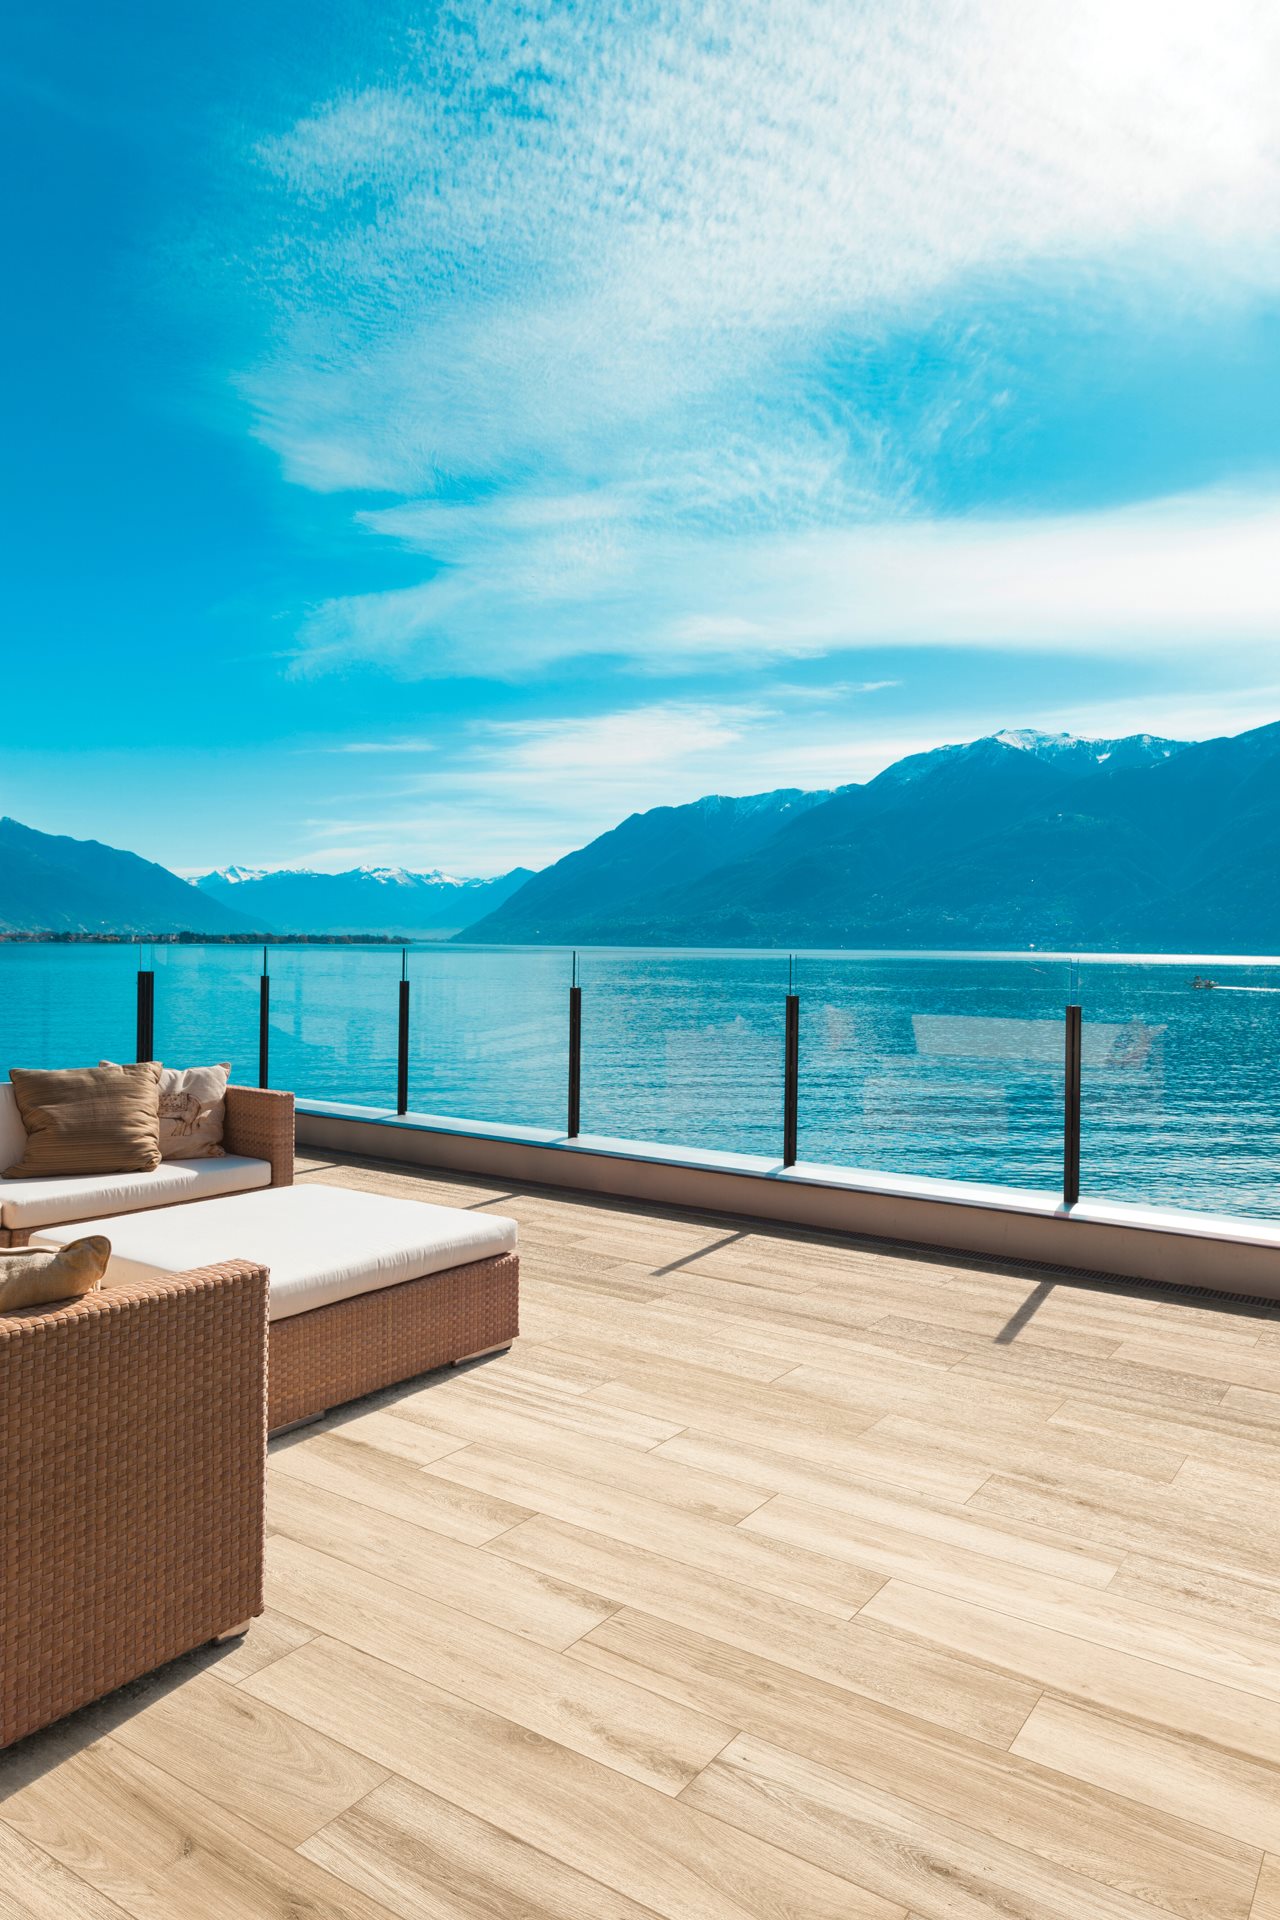
As one of the strongest natural stones, slate is a stellar choice for almost any application. Whether you use it for flooring, countertops or backsplashes, this versatile stone can elevate interior and exterior designs and styles. Because of its color and variation, slate tile is the perfect neutral backdrop that offers rich contrast and brightness.

Bring your vision to life with natural stone

Whether you’re considering marble, granite, quartzite, limestone or slate, the various color options allow you to find the perfect stone to bring your design vision to life. To find options that fit your personal aesthetic and design needs, visit Daltile.

Want to improve your home’s curb appeal? Start with your driveway

2023-09-23T05:01:00

(BPT) – Whether you’re planning to sell your house in the near future or you just want to improve the look of your home’s exterior, the first thing you may think of to improve its curb appeal is landscaping. However, a driveway that’s in poor condition can seriously detract from your home’s appearance, no matter how tidy your grass and shrubs may be.

To make a good impression on neighbors, guests and potential homebuyers alike, make sure that one of the first things they notice — your driveway — is in great shape. A driveway that’s clean and well-kept goes a long way toward that positive first impression you want to convey, so now is a good time to protect your investment and improve your home’s value by addressing how your driveway looks.

Before the harsh winter weather makes some outdoor projects impossible, take time this fall to protect and seal your concrete driveway so that it not only looks great, but is also safer for cars and pedestrians alike.

To seal your driveway effectively, you’ll need to do some prep work first. Here are the steps you should take to get your driveway in shape, so it will withstand the winter better and still look good when springtime rolls around again.

1. Clean before you seal. For sealer to bond well, your driveway’s concrete slab should be as clean as possible. Dirt, grime and oil are “bond breakers” that will prevent sealer from adhering properly. To clean your driveway thoroughly, use a 1500 PSI pressure washer first. You can rent pressure washers for a reasonable cost at most home improvement retailers and some rental companies.

2. Check for cracks. Examine your driveways for cracks, flaking or any other surface damage that needs to be repaired. Once the surface is fully dried, you can use Quikrete® Concrete Repair or Quikrete Gray Concrete Crack Seal to quickly and easily patch up your driveway. Watch this video to see how to correctly use these products to repair cracks in your driveway.

3. Use a stain remover. If you spot any stains that are caused by motor oil, rust or efflorescence (crystalline salt deposits) on the concrete, it’s recommended to remove as many as possible before you apply the sealer, using Quikrete Oil Stain Remover and/or Quikrete Efflorescence and Rust Remover. Make sure to thoroughly rinse the driveway after using one or both of these products.

4. Apply driveway sealer. Do not apply sealer until your driveway is completely dry. Then get ready to apply ready-to-use Quikrete Acrylic Concrete Cure and Seal to seal and help protect your concrete driveway from acids, grease, oils, food stains, salt and more.

Make sure to:

  • Check the forecast. Make sure the temperature will be above freezing for 24 hours before applying, and it should be 50 degrees Fahrenheit or above when applying the sealer. If it’s too cold, the product will be slow to set or could even freeze, rendering it ineffective. Do not apply if rain, heavy dew or temperatures below 50 degrees F are expected within 24 hours of applying sealer.
  • Read and follow all instructions, precautions and safety guidelines on product packaging. Note: You should wear impervious gloves and prevent skin contact with the product. Remove any of the product that may get on your skin or clothes promptly, while wet, with soap and water. Also clean your application tools with water immediately after use.
  • Gather the tools you need such as gloves, a garden sprayer and brush.
  • Apply evenly for best results. For sealing finished concrete surfaces, apply using a broom, brush, roller or garden sprayer to dry concrete or masonry.

To learn more about home improvement projects and to find the products you need, visit Quikrete.com.

Fall in love with your home: 4 ways to renovate your home this autumn

2023-09-20T10:15:00

(BPT) – Fall is the perfect time to take on some home renovations, before the holidays hit and winter sets in. With just a few changes, you can make your home into a more functional space and create a warm, inviting atmosphere in which you and others will enjoy spending time for many seasons to come.

Let these four home renovation ideas inspire you to spruce up your space this autumn.

1. Make over the mudroom

If you have a mudroom, you know how helpful this space can be during the changing season. Over the course of fall and winter, a mudroom can help keep your house clean and organized by containing the mess of wet coats and dirty boots.

Upgrade your mudroom to make it more functional and easier to maintain. For example, you can incorporate storage solutions to store and organize your boots, add a bench to sit on while you take your shoes off and install hooks to hang your coats.

2. Upgrade your flooring

One way to bring a whole new look to your home is by bringing in new flooring, which can serve as the foundation for all interior styles. And, while there are so many great flooring options to select from, many homeowners today are opting to seek out floors that not only look great but also can stand up to busy households and traffic.

A great option that brings fantastic, real-wood looks coupled with kid-and-pet-proof performance is LL Flooring’s new ReNature by CoreLuxe. This floor is waterproof and resistant to dents, scratches, scuffs, and stains — plus it’s made from 25% recycled materials, another perk for homeowners who prioritize aesthetics, functionality and responsible manufacturing. What’s more, with renovation season upon us, DIY’ers will love this easy-to-install flooring.

“ReNature by CoreLuxe is a perfect flooring solution that unites progressive manufacturing with design ingenuity, resulting in a product that’s both resilient and stylish,” said Jen Meska, Head of Merchandising at LL Flooring. “This flooring is manufactured with a commitment to material reuse, while providing a tough, resilient and waterproof solution for pros and homeowners.”

The company also offers myriad stylish, quality options in solid hardwood and Duravana hybrid resilient flooring, so you can choose the perfect flooring for your fall home renovation project.

3. Give your fireplace a facelift

As the weather cools down, it’s time to light your fireplace. But before you do, give your fireplace a makeover so you can transform your living room into a relaxing and welcoming space for your friends and family.

Some easy ways to give your fireplace a facelift include updating or replacing the mantel or replacing the current surround with new stone or tile. If you’re feeling ambitious, add a built-in seating area nearby. This seating area makes it easier to enjoy the warmth and glow of the fireplace and acts as a focal point for fall gatherings.

4. Extend your entertaining space outdoors

Don’t limit your entertaining to the indoors. With a few additions, you can easily extend your living or dining room into your outdoor space.

Add a firepit or fire table to your deck or patio so you can have cozy conversations around the fire underneath the stars. Also, consider investing in comfortable outdoor furniture so you can dine outdoors or enjoy drinks surrounded by the fall foliage. These additions make it easy to maximize your time outdoors.

This fall, give your home a little time, love and care. Using these four tips, you’ll be well on your way to turning your home into a space you’ll love to spend time in this season and beyond.

Why porcelain countertops and extra-large slabs are wonderful design elements

2023-09-18T08:01:00

(BPT) – Today’s homeowners want to use materials in their homes that fit their busy lifestyles. Porcelain countertops and extra-large slabs meet this need perfectly as they are beautiful, durable, very low-maintenance and affordable. Porcelain slabs can be used on many surfaces, including countertops, floors, walls, fireplaces, vanities, backsplashes, shower walls, tub surrounds and even exterior flooring and cladding. They bring the stunning on-trend colors and patterns of marble, slate and other natural stones, as well as modern concrete looks, to a space while still standing up to real-life activity.

Daltile, America’s leading porcelain tile and countertop provider, knows how porcelain slabs can transform a home from fine to fab. Check out its eight reasons you should consider using porcelain slabs in your next home design venture.

1. Luxury at an attainable price

Porcelain slabs are a great solution for designs that require a high-end look on a budget. They easily bring the scale and style of natural stone slabs to projects where real stone, like marble, might be cost- or installation-prohibitive. Thanks to modern technology, the industry’s top manufacturers can create realistic designs that make it hard to tell the difference between porcelain slabs and the natural materials they emulate.

2 Stops bacteria in its tracks

In today’s “germ-aware” world, you’ll want a surface that is durable and easily cleanable. Porcelain slabs are up to the task. Not only are they easy to clean, but they’re also resistant to the growth of bacteria, mold and mildew. Regular, basic cleaning with water and mild soap is all you need. Also, if you use professional cleaning services, you can rest at ease knowing your porcelain will not be damaged.

3. Easy to install

A porcelain countertop can be installed right over your existing countertop. No demolition needed!

4. Powerful design impact

One of the hottest trends in interior design is using seamless, continuous design to create style and luxury. This design trend is easy to achieve with extra-large porcelain slabs. They add powerful design impact whether you use it for a single installation, a floor-to-wall-to-countertop continuum or even book-matched for a stunning feature wall.

5. Perfect for kitchen islands

A kitchen island is a useful and eye-catching feature in any kitchen. Porcelain slabs create beautiful kitchen islands with minimal or no seams. A porcelain slab island can also withstand the wear and tear of busy family life and frequent entertaining. For example, Daltile’s Panoramic Porcelain Surfaces line is heat resistant, so you can set hot pans and pots on its surface. It’s also water- and stain-resistant, so your porcelain kitchen island will look good for years to come.

6. Ideal for a master bathroom oasis

Master bathrooms act as an oasis in a chaotic, kid-friendly home or as an escape from today’s stressful, fast-paced world. That’s why many new home constructions and renovations focus on turning master bedrooms into personal retreats. Opt for porcelain slabs to create a seamless design with wrap-around luxury in your bedroom.

7. Solid base for super shower

The “Super Shower” has also become a must for many homeowners. This luxurious shower features various amenities like rain showers, multiple showerheads and digital water temperature controls. Here again, porcelain slabs offer a seamless design that flows across several surfaces (floors to walls to countertops), creating luxury and elegance.

8. Fitting for exterior spaces

Porcelain slabs aren’t limited to interior designs. They’re also an excellent material for outdoor spaces for relaxing and entertaining, including outdoor bars, kitchens and beautiful sitting areas. With porcelain, you can enjoy the same high level of sophisticated indoor design style but in the great outdoors.

Are you ready to update your home with quality porcelain tile? Visit Daltile to find countertops and a variety of porcelain slabs to turn your home into your dream space.

4 ways to embrace the modern industrial design trend on a budget

2023-09-16T05:01:00

(BPT) – If you like exposed brick, neutral colors, metal accents, glass and concrete, you’re probably a big fan of modern industrial design. By starting with a few details, it’s easier than you think to integrate this on-trend aesthetic into your home décor — without breaking the bank.

Try these ideas for incorporating industrial elements into your home.

Have a light bulb moment

Whether you use Edison-style light bulbs as string lights or swap out some of your regular bulbs, the exposed filaments of these bulbs instantly transport you to the early industrial age. Today’s Edison-style LED bulbs come in a variety of shapes and sizes to suit a wide range of fixtures.

Enter the neutral zone

A coat of paint easily transforms any room’s appearance. For the industrial aesthetic, choose a monochromatic look using white, black, gray or brown, then add a few accents like light fixtures, art or vases that use metal, brick, glass or wood.

Put the pedal to the metal

Switching out drawer and cabinet hardware with mixed metals is another quick and easy way to emphasize the industrial feel. Opt for matte black and brushed metals to create visual interest.

Set it in concrete

Creating a concrete countertop is a simple project to undertake — and easy on the wallet. Concrete countertops are also not just for kitchens anymore. You can create a concrete countertop for a bathroom, living room, outdoor kitchen, entryway — if you can imagine it, you can make it.

Concrete is very versatile, so you can create a one-of-a-kind statement piece as a simple weekend project. All you’ll need is Quikrete® Concrete Countertop Mix and a base. You could build your own base like this iron bar table, or repurpose something you already own or find at a thrift store. Because concrete is endlessly customizable, Quikrete Concrete Countertop Mix can transform an entry table, patio island or coffee table into a signature masterpiece. Whatever you build will be extremely durable and practical — while also enhancing your modern industrial look.

Here are basic instructions for creating a concrete countertop for your home:

Safety first: Before beginning any concrete project, make sure you have proper safety gear like eye protection and waterproof gloves.

1. Determine the dimensions of the countertop. If it will serve as a bar, make sure it extends at least 6 inches beyond the base to allow room for stools.

2. Build the countertop forms. Design and construct the forms in multiple sections to allow for the weight of the concrete. For example, if you’re creating a concrete countertop for an entry table, build forms from 3/4″ melamine-coated particle board by screwing four 1.5″ strips to a base sheet according to the countertop dimensions. Another advantage of smaller sections is that if they’re less than 4′ rebar is not required.

3. Apply a bead of silicone caulk in the seams of the forms. Then smooth with a caulk tool or your fingertip to give the countertop a smooth edge.

4. Mix the Quikrete Concrete Countertop Mix by following the directions on the bag. Then pour into the forms in two 1″ layers. If necessary, place metal rebar or wire mesh between the two layers for additional strength.

5. Overfill the forms slightly before pulling a 2×4 in a sawing motion over the surface several times in each direction. This process, known as screeding, will level what will be the underside of the countertop.

6. Consolidate the mix and remove air voids by tapping the forms with a rubber mallet or vibrating with an orbital sander without the pad.

7. Remove the forms after 18 hours. Once each countertop section is removed from the forms, smooth the edges with fine sandpaper.
Note: Although you have to wait a few days before the countertop fully forms with many concrete mixes, Quikrete’s Concrete Countertop Mix doesn’t have to sit for more than a day.

8. With the help of another person, place the newly formed countertop pieces on top of the base. If your countertop project requires any hardware or appliance installation, make sure you follow the manufacturer instructions.

9. Seal your concrete countertops with Quikrete Acrylic Concrete Cure & Seal to protect them from stain-causing contaminants like dirt, oil and grease.

Pro tip: To customize your concrete countertop, add liquid cement colors during the mixing process and stain the surface. You can also fill air holes with Polyblend Non-Sanded Grout from Custom Building Products.

Ready to get started? Watch this how-to video on Quickrete.com.

Using these tips, you can become your own interior designer, creating a modern industrial look that’s visually appealing, minimalistic and flexible for just about any space in your home.

5 signs you may have problem water at home

2023-09-12T11:01:01

(BPT) – Fall is just around the corner and many homeowners are starting to compile their home maintenance checklists. With cooler temps on the horizon, it’s a good time for seasonal projects like inspecting your roof for summer storm damage, sealing windows and doors, or moving outdoor furniture to storage. Culligan International, a world leader in the treatment of water, says it’s also the perfect time to ensure that your water is cleaner and safer for both you and your home.

Water contamination can happen through a local municipality, an underground well or a homeowner’s own pipes. It’s important to have your water tested by a trusted water expert who can determine the necessary steps to eliminate any harmful impurities that may be present.

Here are five telltale signs that you should have your water tested:

1. Changes in Taste, Smell or Appearance.

A change in the taste, smell or clarity of your water could indicate that contaminants are present. A water test will be able to detect harmful contaminants that might be in your water and help determine the proper treatment solution. While there are many treatment options, Culligan’s Aquasential® Smart Reverse Osmosis (RO) Drinking Water System is generally regarded as the World’s Most Efficient RO Drinking Water System.* With up to seven stages of filtration and 14 different filter options, it is certified to reduce 59 contaminants including lead, arsenic, pharmaceuticals, volatile organic compounds (VOCs) and PFAS. Homeowners can have peace of mind with an unlimited supply of great-tasting, cleaner, safer water.

2. Mineral Build-up.

If you notice mineral deposits, stains or a white film on bathroom fixtures, dishes and sinks, this may be because you have hard water in your home. Hard water is high in mineral content like calcium and magnesium carbonates, bicarbonates and sulfates. These minerals can also clog showerheads and appliances, make soap and detergent less effective and leave clothing looking dingy and wear more easily. Water softener systems remove these minerals. Culligan’s Aquasential® Smart High Efficiency (HE) Water Softener offers high-efficiency water softening for your home and is regarded as the world’s most efficient water softener**. It can optimize salt, water and electricity, with smart features that let you track water usage and set goals and receive service notifications like low salt alerts. With soft water, your appliances, dishes and clothing can remain in good health and even last longer.

3. Dry Hair and Skin.

You may also have hard water in your home if you notice changes in your skin and hair. Showering or bathing in hard water can leave a film of soap on your skin. This can prevent the removal of dirt and bacteria and irritate the skin. Washing your hair in hard water can cause build-up that makes it tangle more easily, look dull and feel rough. Softening your water will help keep hair and skin silky smooth.

4. Frequent Plumbing Repairs.

Since your home’s pipes are constantly in contact with your water, water that contains harmful impurities can lead to damage in your home’s plumbing system. Frequent clogging and leaks are signs that you may have problem water that needs treatment. In addition to a plumber, you’ll want to call a water expert to test your water and determine the appropriate treatment solution.

5. Expensive Water Bill.

If you notice a sudden increase in your water bill, this could point to untreated water. Since your plumbing system needs to work harder when there are mineral build-ups in your pipes and home appliances, the impact can often be felt on your pocketbook.

For more information about water treatment solutions or to schedule a free in-home water test, visit www.culligan.com.

A simple outdoor project to improve your property before winter

2023-09-09T05:01:00

(BPT) – Looking to make improvements to the overall look of your property before it gets too cold or snowy? This is a great time of year to address any cracks you may have noticed in your concrete driveway, patio, pathway or steps. As long as the temperature is staying above 45 degrees Fahrenheit, you can still take care of this type of task during the early fall months.

While concrete is very durable, cracks can occur due to weather conditions and temperature changes, amongst other issues, and over time could make your property look unkempt, as well as growing to cause a potential safety hazard. Taking care of the cracks you see as soon as possible — before they get any bigger — is an ideal way to help prevent further problems with your concrete surfaces. This is an easy way to help keep your property looking tidy, safe and well maintained.

Before the temps drop and the snow flies, here are steps you can follow to address any cracks you may be noticing. This is a project you can tackle in a single weekend, with the right supplies. One of the easiest products to use is Quikrete® Concrete Crack Seal, which is a pre-mixed blend of latex emulsion formulated to fill cracks in horizontal concrete surfaces.

Before you begin, here’s what you’ll need for the project:

Then, follow these steps to ensure you get the job done right.

1. Check the forecast: If rain is expected within 24 hours, you should postpone this project until you know the weather will be dry. You’ll also want to be sure the temperature outside will be between 45 and 100 degrees Fahrenheit (or 7-38 degrees Celsius). Do not use the sealant product if freezing temperatures are in the immediate forecast.

2. Prep the area: Use your chisel to remove debris inside the crack, and your wire brush to clean loose dirt, grit or gravel from the surface. You could also use a leaf blower, if you have one, to help clear away unwanted material. AA pro tip is to thoroughly clean the area with Quikrete Concrete & Asphalt Cleaner to ensure the best bond with the sealant.

3. Measure the crack size: If the crack you need to fill is deeper than 1/4 inch, it’s recommended to use a filler first, such as all-purpose sand. Fill the crack with sand to within 1/4 inch of the surface. When combined with the sealant, the filler will help ensure that a larger crack is completely sealed. Do not apply in cracks that are wider than half an inch.

4. Use the sealant: Start by shaking the container of Quikrete Concrete Crack Seal to make sure that the product is well blended. Next, cut the tip of the spout to make a 1/4-inch to 3/8-inch opening. Squeeze the formula into the crack, working slowly. Overfill the crack slightly, as the product will shrink. The sealant is self-leveling, and its color blends well with gray concrete.

5. Let it cure: After pouring the sealant, wait 24 hours for the product to cure. You can apply a second coat after 24 hours, as needed, to provide a more uniform finished surface.

Crack sealing is an easy and low-cost fix, but if you’re seeing multiple cracks and holes, it may be time to consider a more complete and permanent solution. However, sealing cracks now will help prevent future damage and give you time to plan for bigger projects in the future. With these minor repairs in place, you can be confident that your driveway or other cement surfaces will be in better shape by the time spring rolls around again.

Discover your dream floor: Follow these 4 steps to find the perfect fit

2023-09-08T10:31:00

(BPT) – Planning a home renovation project? You may be feeling some excitement, anxiety or a thrilling mix of both. Of course, making changes to your home can be fun, but there are so many choices to be made, especially when it comes to choosing flooring that will serve you for years to come.

Flooring can make a huge impact on your space, and choosing the right material and style can make the difference between a room you like and one you love.

To help you through this process from selection to installation — and even make it enjoyable — LL Flooring created a simple, guided four-step flooring process for homeowners and pros alike to ensure that they find the flooring of their dreams.

“We’ve seen how the task of selecting flooring can be challenging, especially for first-time shoppers,” said Charles Tyson, President and CEO of LL Flooring. “This four-step process draws from our deep understanding of our customers’ needs and our ever-evolving flooring options to provide a smart, simple and streamlined experience that makes selecting floors easier than ever.”

1. Find the right material

First, you need to find the best material for your flooring project. Between solid hardwood, engineered hardwood, vinyl, laminate and tile, there are seemingly endless options of flooring styles to choose from.

To pick the right one, you’ll need to consider your lifestyle and space to ensure the material you choose will hold up to the elements in your day-to-day life. Factors to consider can range from your family, pets, regional climate and area of the home.

If you need help picking the right material for your home renovation project, check out LL Flooring’s Floor Finder. Flooring experts are also available to speak with you online or at your local store.

2. Find the right style

How do you want your space to feel? When choosing a flooring style, make sure it fits the overall aesthetic of your room and home by choosing colors and textures that appeal to you and your unique sense of style.

You can see how your space will look using a digital tool like LL Flooring’s digital floor visualizer, Picture It! Paired with an in-store consultation, you can find the right flooring that expresses your style and complements your home.

3. Finalize your choice

Now that you’ve considered your needs and style, it’s time to get your hands on flooring samples. Order free flooring samples to test at home, so you’ll know exactly how they’ll look in your space. Seeing and feeling the potential options underfoot can help you make your final decision with confidence.

When reviewing your flooring samples, ask an LL Flooring expert about previous customer reviews and double-check that they will suit your lifestyle and interior design. This will help you narrow down the final purchase decision.

4. Install and celebrate

Finally, you’re ready to make your vision a reality. Whether you prefer to do it yourself or hire professional installers — available through LL Flooring — all the previous steps have come together to bring your home project to life. Once the final piece is in place, it’s time to celebrate your renovated space.

Boost your home value with these 5 outdoor project upgrades

2023-09-06T01:01:00

(BPT) – Are you looking for eye-catching and practical ways to upgrade your home? Consider investing in an outdoor renovation project! From installing or remodeling a patio to adding an outdoor fireplace, these outdoor projects can make your home an inviting space in which you and others will want to spend time.

To inspire and help you along your outdoor design journey, Belgard® — a leading provider of outdoor home products like pavers, retaining walls and other landscape features — offers five outdoor design inspirations you can implement in your next home improvement project.

1. Upgrade your patio

A patio or deck can be a wonderful addition to your home. It acts as an extension of your home and provides another livable space to relax and socialize with family and friends. You can even incorporate an outdoor dining area and workspace to create a multi-purpose patio.

Whether you want to add a patio or upgrade your existing one, doing so also adds value to your home. According to the National Association of Realtors Research Group (NAR) 2023 Remodeling Impact Report, a new patio typically costs $10,000-$10,500. However, homeowners that installed a patio recovered 95% of the value from the project.

When designing your patio, consider using concrete pavers to incorporate textures and colors. Concrete pavers are a great way to complete the feel of your outdoor space and seamlessly blend the hardscapes in with the existing layout because they complement various design styles. They’re also a great investment and have a life span of 30 to 100 years to withstand extreme weather and bear heavy weight.

2. Invest in landscaping

If you want to improve the appearance of your home and get an instant return on investment, upgrade your landscape. Not only does investing in landscaping enhance your home’s curb appeal, but it also extends a warm invitation into your home for visitors.

The NAR report found that lining your walkway of pavers with plants, or adding in raised beds and shrubs, allowed homeowners to recover 104% of the project’s cost. However, if you want to start small, adding flowering shrubs, shading trees or mulching are easy, cost-effective ways to revive your yard.

3. Add shade structures

During the warmer months, you’ll want shade structures so you can get the most out of your outdoor space, no matter the temperature. Escape the heat by installing a pergola on your patio.

Pergolas are a popular option because homeowners can choose various materials, styles and colors to fit their layout. A well-designed pergola can boost property values and increase the usability of the backyard.

Decorate your pergola with sun-blocking curtains and hanging plants to create the perfect private getaway in your backyard. For a more cost-effective option, a trellis with plants or greenery can provide both privacy and shade.

4. Install an outdoor kitchen

Outdoor kitchens are becoming increasingly popular with homeowners and potential buyers. They allow people to spend as much time outdoors as possible while entertaining and feeding guests. It also means that you don’t heat up your house during the summer months.

Compared to other outdoor home improvement projects, outdoor kitchens offer a substantial return on investment. NARS found that homeowners recovered 100% of the cost of building an outdoor kitchen. The report also found that 99% of homeowners who added an outdoor kitchen felt a greater desire to be home and 71% felt an increased sense of enjoyment with their home.

Note: Ensure the kitchen is functional within your space and has shelter from rain or intense sun, so you have optimal time to utilize it throughout the year.

5. Incorporate a fire feature

Whether you choose a fireplace or pit, an outdoor fire feature will add value to your home and allow you to make memories with friends and family in a cozy environment huddled around whichever feature you choose.

Fire features also add 32% better functionality, livability and personality to your home and make your outdoor space more usable, so you can enjoy your outdoor space during a brisk summer evening or in colder climates.

Consider your budget, space layout and function for fire features to ensure you choose the right one for your backyard and family. A DIY fire pit is a great inexpensive option with versatile use and style. Opt for an outdoor fireplace if you’re looking for a more premium option. It can double as a privacy wall and takes up less space than a typical fireplace.

Let these five outdoor renovation projects inspire you to upgrade your home, add value to your property and make your home a place you and others want to spend their time. For more outdoor design inspiration, visit Belgard.com.

Embrace the space with top tile trends for outdoor living

2023-08-29T07:01:01

(BPT) – Homeowner demand for elevated outdoor spaces is on the rise across the country. Among the trends shaping outdoor designs, one material is emerging as a standout choice: tile.

“The appeal of stunning and functional outdoor living areas constructed with stylish, long-lasting materials is undeniable. Tile is the go-to for so many outdoor applications because its durability, design flexibility and functionality can’t be beat,” said Laura Grilli, director of product design for Daltile.

Grilli shares the top tile trends for creating beautiful outdoor living areas:

1. Blending the indoors and out

Flowing cohesive design from the indoors to outdoors connects aesthetics and elevates spaces. For example, the outdoor living space will be a visual continuation of the adjacent indoor living space. This is often achieved by using similar materials in both spaces, often including tile, to create consistency and connection.

2. Porcelain is the tile of choice

Tile is available in many different materials, but porcelain tile is trending for outdoor applications. Porcelain is inherently durable, stainproof, scratchproof, waterproof, frost resistant and fire resistant. Plus, advances including Daltile’s Xteriors porcelain line include many options in size, design, color and slip-resistance that are ideal choices for outdoor designs.

3. Focus on functionality and entertainment

Due to the bevy of benefits of porcelain tile, it can be used in near-endless ways. Many people desire outdoor spaces for relaxing and entertaining, so outdoor bars, fancy kitchens and beautiful sitting areas are trending. Porcelain lets homeowners enjoy the same high level of sophisticated style in outdoor tiles and countertops that historically was only available indoors.

4. Walkways and walkable surfaces

Creating pathways between outdoor spaces connects a property and facilitates movement. Products such as porcelain 2cm pavers are now making authentic stone and wood looks available to replace common concrete pavers that used to be the standard outdoor walkway option.

5. Style without maintenance

When it comes to outdoor porcelain tile, planks, slabs and countertops, you get the high-end look of stone, marble and wood without the maintenance, upkeep or wear concerns. No sealing is ever needed. Simply clean with mild soap and water to keep spaces looking like new.

“Incorporating tile into your outdoor design brings a multitude of benefits that go beyond aesthetics. Its durability and resilience make it a practical choice for withstanding the elements and maintaining its beauty over time. With an array of styles and patterns available, tile allows you to unleash your creativity and personalize your outdoor space,” said Grilli.