Simplify home improvement projects by installing tile with an adhesive

2019-05-20T08:47:00

(BPT) – While styles, colors, sizes and other tile trends may change over time, there is no disputing tile’s popularity as a way to update a kitchen or bathroom. From a white subway tile backsplash in the kitchen to a gold-accented mosaic tile countertop in the bathroom, there are countless ways to improve the look and value of these rooms with tile. However, the long-term viability of these surfaces is determined by proper installation, including how the tile is attached to the substrate. For homeowners, using an adhesive like OmniGrip® or AcrylicPro® from Custom® Building Products makes the process faster and easier than using a traditional thin-set mortar.

As a pre-blended material, adhesives don’t have to be mixed and are ready-to-use right out of the bucket. They also spread smoothly and provide plenty of time to adjust tiles before they permanently bond to the substrate. Adhesives can be used over flat and sound substrates including concrete, cement backerboard, exterior-grade plywood or interior drywall. Designed to install approximately 8″ x 8″ or smaller tile in areas with light exposure to moisture, adhesives are ideal for homeowners with limited installation experience, but who have the desire to do the job themselves.

For lots of quick tips on working with adhesives, watch our video: How to Install Tile with an Adhesive.

Remember to put safety first, so follow manufacturer instructions, and wear eye protection and gloves as needed.

  • Gather tools including a notch trowel, grout spacers, measuring tape and straight edge or level. The tile size will dictate the trowel notch type and size needed for the project.
  • Properly prepare the substrate according to Tile Council of North America guidelines before applying adhesive. Regardless of the substrate, be sure to clean the surface of dust or other contaminants that could prevent the tile from bonding.
  • Apply a thin skim coat of the adhesive to the substrate with the flat side of the trowel.
  • Add additional adhesive to the substrate and comb in straight lines across the first layer using the notch side of the trowel held at a 45-degree angle. This will ensure that adhesive ridges are at the correct height to support the tile.
  • Set the tile firmly into the adhesive by moving it back-and-forth, and not side-to-side. Make sure the tile is level with surrounding tile and clean excessive adhesive as you go.
    • CUSTOM Tip: Periodically remove a tile to make sure adhesive is covering at least 80% of the back.
  • Leave a quarter-inch gap at the perimeter so a flexible tile caulk can be used in place of grout in these areas to accommodate movement.
  • Wait 24-72 hours (or more depending on conditions and tile size) before applying grout or caulking.

While adhesives make setting tile simple, that is only one step in the tile installation process. For the best possible results, homeowners should use recommended products and follow appropriate instructions for preparing the substrate, grouting the tile and sealing the finished surface. This also means using the proper thin-set mortars in applications less suited for adhesives like large format tile (15″ long on any one side), high-traffic areas or continuously wet surfaces (shower floors). For more information on products and systems used for installing tile, visit Custom Building Products at www.custombuildingproducts.com.


Developing a plan to ensure the safest pregnancy, childbirth and recovery

2019-05-20T14:01:00

(BPT) – Many people would be surprised to learn that among developed countries, the United States not only has the highest rate of maternal mortality (death during pregnancy or within one year of birth), but that it increased 56% between 1990 and 2015. The American Society of Anesthesiologists (ASA) says expectant mothers should talk with their obstetrician and physician anesthesiologist to develop a plan that ensures the safest pregnancy, childbirth and recovery.

“Thanks to the miracles of modern medicine more women are giving birth in their late 30s and 40s, but this does not come without some risk,” said ASA President Linda J. Mason, M.D., FASA. “Expectant mothers know they shouldn’t drink or smoke while pregnant, but many aren’t aware how important it is to focus on their overall health, for their safety as well as their baby’s. Older mothers, certain health conditions and multiple cesarean deliveries are some reasons the maternal death rate has risen. Physician anesthesiologists not only are experts in managing pain during and after childbirth, they work closely with obstetricians to combat the growing mortality trend.”

To ensure the safest care for you and your baby, ASA recommends the following:

  • Take care of yourself: If you are older, overweight or have diabetes or high blood pressure, work closely with your physicians to address your condition prior to labor and delivery to ensure you understand all possible complications and have a plan. About halfway through your pregnancy meet with your physician anesthesiologist, who will provide information to help you feel safe by developing an optimal labor, delivery and recovery plan.
  • Express your concerns: If you have had a bad experience with anesthesia, have any fears about childbirth or if something doesn’t feel right, let your obstetrician and physician anesthesiologist know. Be sure to ask about other issues, such as if you can have an epidural if you have a slipped disk or lower back tattoo.
  • Ask about an emergency plan: Your physicians will always prioritize your safety as well as your baby’s. But it’s important to know your hospital has an emergency plan in place. Physician anesthesiologists have extensive critical care training and are experts in treating emergencies such as postpartum hemorrhage and preeclampsia.
  • Know experts are working to improve care: Physician anesthesiologists are leading the way to develop protocols that improve safety during and after childbirth, including:
    • Best practices for managing common causes of maternal death, including postpartum hemorrhage and high blood pressure that can lead to preeclampsia, seizures, coma, brain damage, blood clots and death.
    • “Early warning systems” that trigger an immediate evaluation if a mother’s health declines.
    • Refining labor and delivery pain management techniques, including epidurals and spinal anesthesia.
    • Multi-disciplinary review committees to examine maternal deaths, identify causes and implement prevention efforts.
  • Plan your pain management: Untreated post-delivery pain can lead to post traumatic stress disorder (PTSD) in some women, so don’t downplay your pain. Ask your obstetrician to reach out to your physician anesthesiologist if you have questions regarding how to manage pain after birth and if opioids are an option.

“The maternal death rate is 26 deaths in 100,000 births, but even one death is too many. The rising rate in the United States is a wake-up call for this country,” said Dr. Mason. “With more awareness and proactive management, it can be decreased.”

To learn more about the critical role physician anesthesiologists play in managing emergency care, including during labor and delivery, visit www.asahq.org/WhenSecondsCount. For more information about pain management during labor and delivery and the importance of seeing a physician anesthesiologist, including a downloadable birth plan, visit asahq.org/birth.


6 ways to save money when shopping on Amazon

2019-05-20T10:52:05

(BPT) – These days, everyone’s looking for bargains and ways to save while shopping online from the comfort of their own homes. With low prices, a wide selection and fast shipping for customers, Amazon has a lot to offer to save you both time and money. Below are six easy ways to save when shopping on Amazon:

1. Discounted offers: Customers receiving government assistance through EBT or Medicaid can enjoy the benefits of an Amazon Prime membership for a discounted monthly price of $5.99, with the ability to cancel anytime. With Prime, members can enjoy fast, free shipping, exclusive savings, and easy access to entertainment with Prime Video, Prime Music, Prime Reading and more. Learn more and sign up for a free 30-day trial at http://amazon.com/qualify.

2. Stick to your budget. Making purchases with cash is a savvy way to stick to your budget, as it makes you more conscious of what you’re spending. When you’re shopping online, you can use Amazon Cash instead of your debit or credit card. It’s a simpler way to shop and will help you manage your spending. You can visit more than 45,000 participating stores — including pharmacies like CVS and convenience stores like 7-Eleven — to add cash to your Amazon Balance. This method is quick, easy and Amazon doesn’t charge any fees.

3. Take advantage of subscriptions. Families can maximize their savings by enrolling in convenient programs such as Subscribe & Save, which allow you to subscribe to a wide selection of items you buy frequently (such as diapers, baby food and household products), and have them shipped to you for free on a regular basis. You’ll not only save up to 15% on the purchases, but you’ll also save the time and energy normally spent on trips to the store.

4. Scout out deals as they pop up. You can track the best deals on Amazon with Lightning Deals, which offer new deals daily to help you save money. It allows you to find the best prices on items you need, want and love. You can also sign up for “watch a deal” alerts so you’ll never miss out on a discount!

5. Earn rewards by waiting. Not in a hurry to get your package? Here’s a little-known Prime perk for those who don’t need their order right away — selecting the “No-Rush” shipping option at checkout earns you rewards and discounts on future purchases. Rewards are automatically added to your Amazon balance, so you can start saving right away. Keep an eye out for this option next time!

6. Discover Bargain Finds. Check out Amazon’s Bargain Finds for a wide selection of seasonally relevant products that are priced even lower — items can vary from clothing and jewelry to gifts and home decor.

Shopping online does not have to break the bank, and you don’t have to spend all your time surfing and comparing prices. Thanks to Amazon, you can enjoy some of the best options available for shopping all in one place, and do it within your budget.


Winning the mental health battle with genetics

2019-05-20T08:01:01

(BPT) – Mental illness is relentless. Patients and their caregivers face stressful days and restless nights — filled with profound physical and emotional challenges. For Brandon B.*, a patient with bipolar disorder, life was like being on a roller coaster, rotating mercilessly out of control.

“After being diagnosed with bipolar disorder in November 2017, I was in the middle of a manic cycle and barely sleeping a couple hours a night, if at all,” says Brandon. “My emotions controlled me. I was living on a roller coaster that was moving quickly from excitement to depression.”

Mental illness is pervasive too. Brandon is one of millions of Americans — over 46 million, in fact — whose lives are impacted by mental health conditions. That equals one in every five adults 18 years of age and older in the U.S. who suffers from mental illness, according to the National Institute of Mental Health (NIMH). Younger people are similarly affected, as nearly half of adolescents between the ages of 13-18 will experience a mental illness.

Staggering financial toll

The burden of mental illness is further ominous when viewed through the lens of its financial consequences. According to an editorial in the American Journal of Psychiatry, serious mental illnesses cost patients more than $193 billion per year in lost earnings. The overall health care delivery system is impacted as well. The NIMH reports that mental health care expenditures are the third most costly medical condition, behind heart conditions and trauma, and tied with cancer. Globally, the World Health Organization projects that depression will become the largest health burden by 2030.

In spite of these dynamics, there is reason for optimism for improved treatment of mental illness and positive patient outcomes.

Breaking the cycle of failed medications

Working with his doctor and eventually finding the medication that worked best for him, Brandon was able to slowly work his way out of the depression that was crippling his life.

“Any time you are dealing with mental health, there can be trial and error in order to identify the medication that works best for you,” says Brandon. “It took me five to six months working with my doctor and trying two medications before I finally found the right one. I was lucky in a sense. For some patients it can take years before they find the medication that actually works.”

Genetic testing points the way

What helped Brandon break the churn of failed medication trials that many mental health patients experience? He found the answers he hoped for in genetic testing.

Through a simple cheek-swab genetic test from Genomind, a PA-based mental health care company, Brandon’s personal genetic markers were identified. The test, administered at his doctor’s office, analyzed Brandon’s genes from two critical standpoints: the effect a drug would have on his body; and how his body would metabolize the same drug. Ultimately, the Genomind test provided the precision information that was needed to help his doctor select an appropriate and safe drug for Brandon’s bipolar disorder.

An evolution in mental health care

The science of genetic testing is steadily influencing the paradigm in the personalized treatment of mental illness. More and more doctors view genetic testing as a valuable component in their clinical toolkit.

“Your clinical understanding of the patient can only go so far without having the genetic component,” said Dr. Violina Frenkel, clinical director at Integrative Behavioral Care in Summit, NJ. “Genetic testing narrows down the clinical picture.”

Treatment guided by genetic testing can also reduce costs to patients and insurers. One notable study showed that, on average, healthcare utilization costs decreased $1,948 per patient over a six-month period for patients who received genetic testing, compared to similar patients who did not.

At the 2019 Annual Meeting of the American Psychiatric Association in San Francisco, Genomind launched its latest genetic testing solution. Genomind Professional PGx tests a panel of 24 total genes and covers 130 FDA-approved medications for multiple psychiatric conditions, making it the most comprehensive mental health-focused genetic test available. The company processes all tests at its in-house lab at 99.9% accuracy and provides free consults to discuss results.

“Working on the front lines with the clinical community in mental health, we are excited about the value our genetic testing solutions provide in helping select safe and effective treatments for patients,” says Shawn Patrick O’Brien, chief executive officer of Genomind.

*Last name withheld to protect privacy.


7 ways to save money when shopping on Amazon

2019-05-20T08:01:01

(BPT) – These days, everyone’s looking for bargains and ways to save while shopping online from the comfort of their own homes. With low prices, a wide selection and fast shipping for customers, Amazon has a lot to offer to save you both time and money. Below are seven easy ways to save when shopping on Amazon:

1. Discounted offers: Customers receiving government assistance through EBT or Medicaid can enjoy the benefits of an Amazon Prime membership for a discounted monthly price of $5.99, with the ability to cancel anytime. With Prime, members can enjoy fast, free shipping, exclusive savings, and easy access to entertainment with Prime Video, Prime Music, Prime Reading and more. Learn more and sign up for a free 30-day trial at http://amazon.com/qualify.

2. Stick to your budget. Making purchases with cash is a savvy way to stick to your budget, as it makes you more conscious of what you’re spending. When you’re shopping online, you can use Amazon Cash instead of your debit or credit card. It’s a simpler way to shop and will help you manage your spending. You can visit more than 45,000 participating stores — including pharmacies like CVS and convenience stores like 7-Eleven — to add cash to your Amazon Balance. This method is quick, easy and Amazon doesn’t charge any fees.

3. Take advantage of subscriptions. Families can maximize their savings by enrolling in convenient programs such as Subscribe & Save, which allow you to subscribe to a wide selection of items you buy frequently (such as diapers, baby food and household products), and have them shipped to you for free on a regular basis. You’ll not only save up to 15% on the purchases, but you’ll also save the time and energy normally spent on trips to the store.

4. Scout out deals as they pop up. You can track the best deals on Amazon with Lightning Deals, which offer new deals daily to help you save money. It allows you to find the best prices on items you need, want and love. You can also sign up for “watch a deal” alerts so you’ll never miss out on a discount!

6. Earn rewards by waiting. Not in a hurry to get your package? Here’s a little-known Prime perk for those who don’t need their order right away — selecting the “No-Rush” shipping option at checkout earns you rewards and discounts on future purchases. Rewards are automatically added to your Amazon balance, so you can start saving right away. Keep an eye out for this option next time!

7. Discover Bargain Finds. Check out Amazon’s Bargain Finds for a wide selection of seasonally relevant products that are priced even lower — items can vary from clothing and jewelry to gifts and home decor.

Shopping online does not have to break the bank, and you don’t have to spend all your time surfing and comparing prices. Thanks to Amazon, you can enjoy some of the best options available for shopping all in one place, and do it within your budget.


3 ideas to freshen up your favorite summer treats

2019-05-20T06:01:00

(BPT) – Summertime brings lots of picnics, barbecues and pool parties, along with tasty treats everyone loves to share. Want to make yummy desserts your friends will rave about, but with your own unique twist?

Add exotic new fruit.

Whether you’re making a fruit salad, a pie or another tasty fruit-forward delight, consider making a colorful statement with exotic fruits. Why settle for the usual grapes, oranges or bananas? There’s a world of amazing fruit out there!

Adventurous fruits to try: the bright pink dragon fruit, juicy passion fruit, orange and spiky horned melon, yellow Buddha’s hand or large green jackfruit. You can find these types of fruits more easily than you might think, but if they’re not at your usual grocery store, check your local specialty grocery stores and farmers markets or order them online.

Simple ingredient swaps can be your best-kept secret.

Consider creating a better-for-you version of your summer favorites with a few ingredient swaps. These tried-and-true simple substitutions will boost nutrition and even enhance the flavors of your favorite recipes.

For sugar (or artificial sweetener) use natural options like honey, agave, maple syrup or applesauce instead. You can substitute unsweetened (about 100 calories) applesauce for sugar (about 770 calories) in a 1:1 ratio, but for every cup of applesauce you use, reduce the amount of liquid in the recipe by 1/4 cup.

Boost nutrition and texture of home-baked bread or muffins by swapping out some flour with oat bran. Rich in fiber and protein, oat bran will help keep you full, and the fiber can also help lower cholesterol; your guests will have no idea, because oat bran holds moisture well so your baked goods won’t be dry.

Top it to the next level.

Elevate your dessert with a dollop of deliciousness. To make your creation even better, use a topping that’s so good, everyone will think it’s homemade. To upgrade a classic dessert, try a whipped topping like truwhip original, truwhip skinny or truwhip vegan. Use it to top your fresh fruit salad, dip your favorite cookies or swap it for old-fashioned whipped cream.

For a fresh summer recipe using truwhip, try this Blueberry Ginger Vegan Cheesecake.

Blueberry Ginger Vegan Cheesecake (Serves 6-8)

Ingredients:

Crust:
1/2 cup coconut butter (NOT coconut oil)
3 ounces (approximately 1 cup) fresh blueberries

Filling:
2 cups cashews, soaked in water for a few hours
Zest and juice of 1 lemon
1 tablespoon fresh grated ginger
1/4 cup maple syrup
1/2 cup full fat coconut milk
3 ounces (approximately 1 cup) blueberries
1 tablespoon vanilla
1/4 teaspoon salt

Topping:
1 container truwhip vegan
Blueberries for garnish

Directions:

1. Spray cake pan with cooking spray. Completely line the bottom and sides with plastic wrap, letting excess plastic wrap hang over the sides of the pan. Spray a little more cooking spray on bottom and sides and line with parchment paper.

2. Make crust. In a food processor, process coconut butter and blueberries until they form a paste. The mixture doesn’t need to be perfectly smooth; a little texture is good.

3. Press crust into bottom of cake pan and up sides. Make sure to create a smooth and even bottom. Set in freezer while you make the filling.

4. Using a blender, add filling ingredients. Puree mixture for a few minutes to be as smooth as possible.

5. Pour filling into the cake pan on top of crust. Set cheesecake in freezer for three hours, or until completely hard.

6. Once the cheesecake is frozen, pull it out using the plastic wrap overhang. The cheesecake should come out easily.

7. Place on cake plate or stand. Top with vegan truwhip and blueberries. Enjoy!

To find truwhip products in a store near you, use the store locator at truwhip.com.


6 Ways to Brighten Your Load

2019-05-20T05:01:00

(BPT) – Whether you live to do laundry or it’s your least favorite chore, we’ve all got to do it. These practical tips and decorating tricks will make the laundry one of the simplest chores on your checklist. Now laundry day doesn’t look so bad after all.

1. Take advantage of your alone time

Whether your child is taking a nap or they’re out on the soccer field, take the opportunity to get a few loads done when the house is quiet! On average, a single wash and dry cycle will take between 1-1.5 hours from start to finish, so plan ahead for a time when the kids will be out of the house that long so you can focus on your laundry and your me time!

2. Make it family-friendly — and safe

Once your kids are old enough, have them help sort and fold their clothes. An important safety reminder, though: Little ones act fast and accidents can happen in an instant, so make sure to store liquid laundry packets and other cleaning supplies out of sight and out of the reach of children. Check out these activity sheets from PacketsUp.com.

3. Save a load, save your fabrics

The sniff test may tell you if you wore enough deodorant, but does not always work when deciding if you need to wash your clothes. What you do, the fabric type, the wear and the weather can play a deciding factor. The American Cleaning Institute offers tips here to help determine if it’s time to wash those bed sheets, jeans, shirts, socks and underwear.

4. Iron be gone

It seems that the only action some ironing boards get is as a catch-all for cast-off clothes. Let’s be honest, who has time to iron? As a time-saver, wrinkle-releasing sprays relax and smooth fabrics to help remove wrinkles — without an iron. For today’s casual looks, the end result is ideal!

5. Shorten the loads

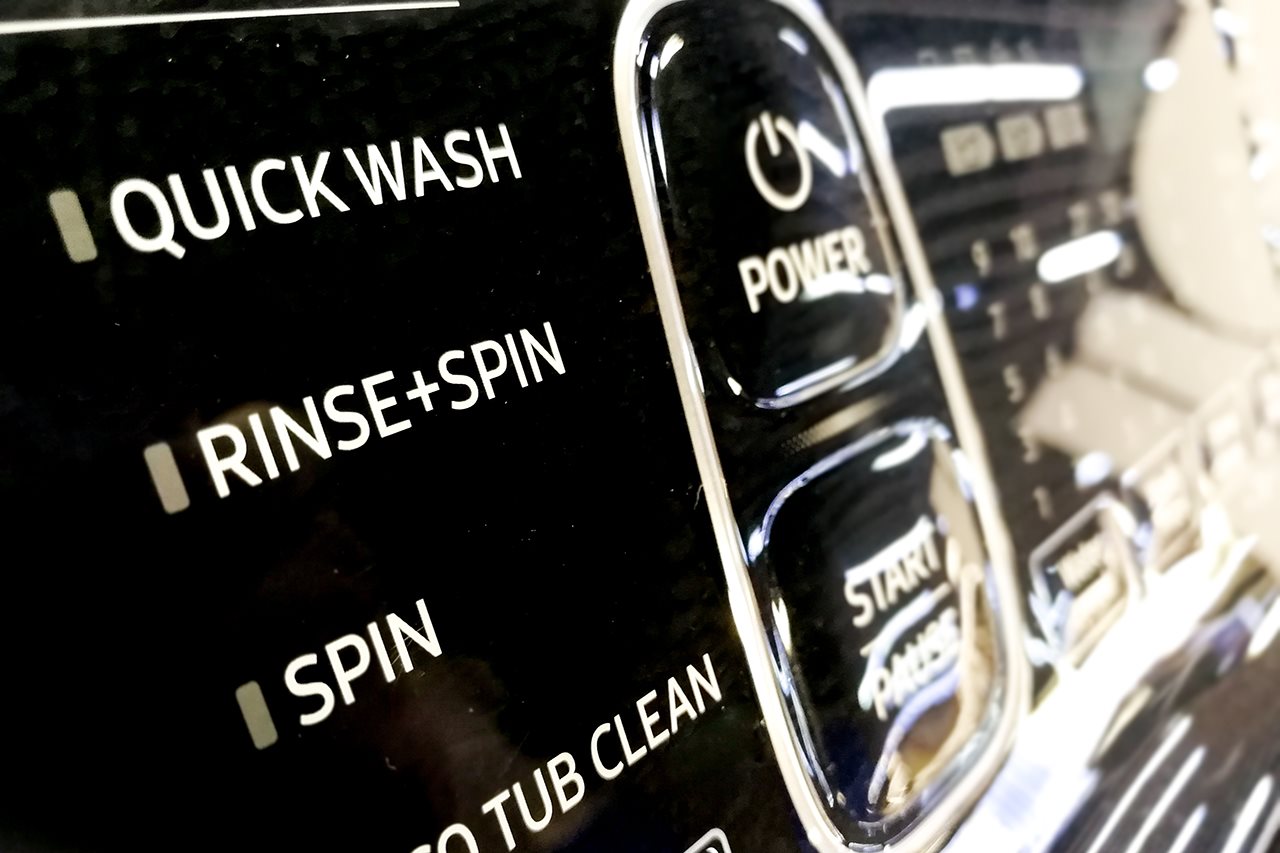
Sometimes you need clean clothes in a hurry or you don’t have close to a full wash worth of dirty garments. Sometimes you just can’t wait for the normal cycle to finish. Luckily there is another option on most modern washing machines that saves time and is more energy efficient: the quick wash.

6. Refresh your laundry room

Laundry rooms (or sometimes, laundry closets) are notorious for being cramped and difficult to keep tidy. Maintaining an organized space will keep your mind at ease and your children safe. Utilize any cabinet space by storing liquid laundry packets up and out of reach and in their original packaging. Unused corners in your laundry room are a great spot to add extra shelving to store towels, sheets and dryer sheets. The extra effort will make a load of difference when you are running out the door!