7 effective ways to improve the air quality in your home this fall

2023-10-27T07:01:00

Photo courtesy Trane Residential

(BPT) – If you’re concerned about your home’s air quality, especially if anyone in your household has asthma or allergies, now is the perfect time to consider cleaning up your indoor air quality. With fall allergy season in full swing and colder air on the way, the quality of the air in your home is more important than ever.

Here are tips to improve your indoor air quality.

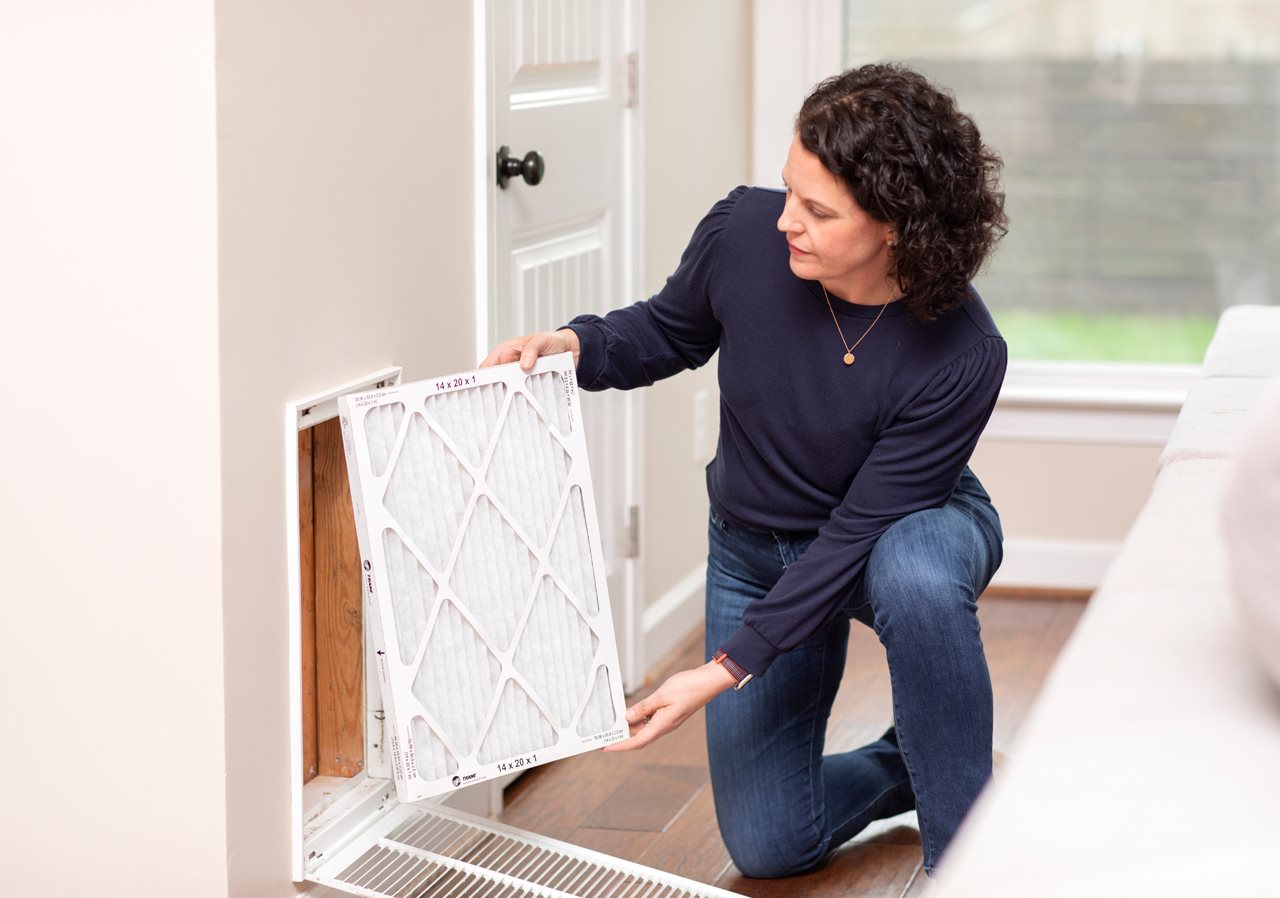
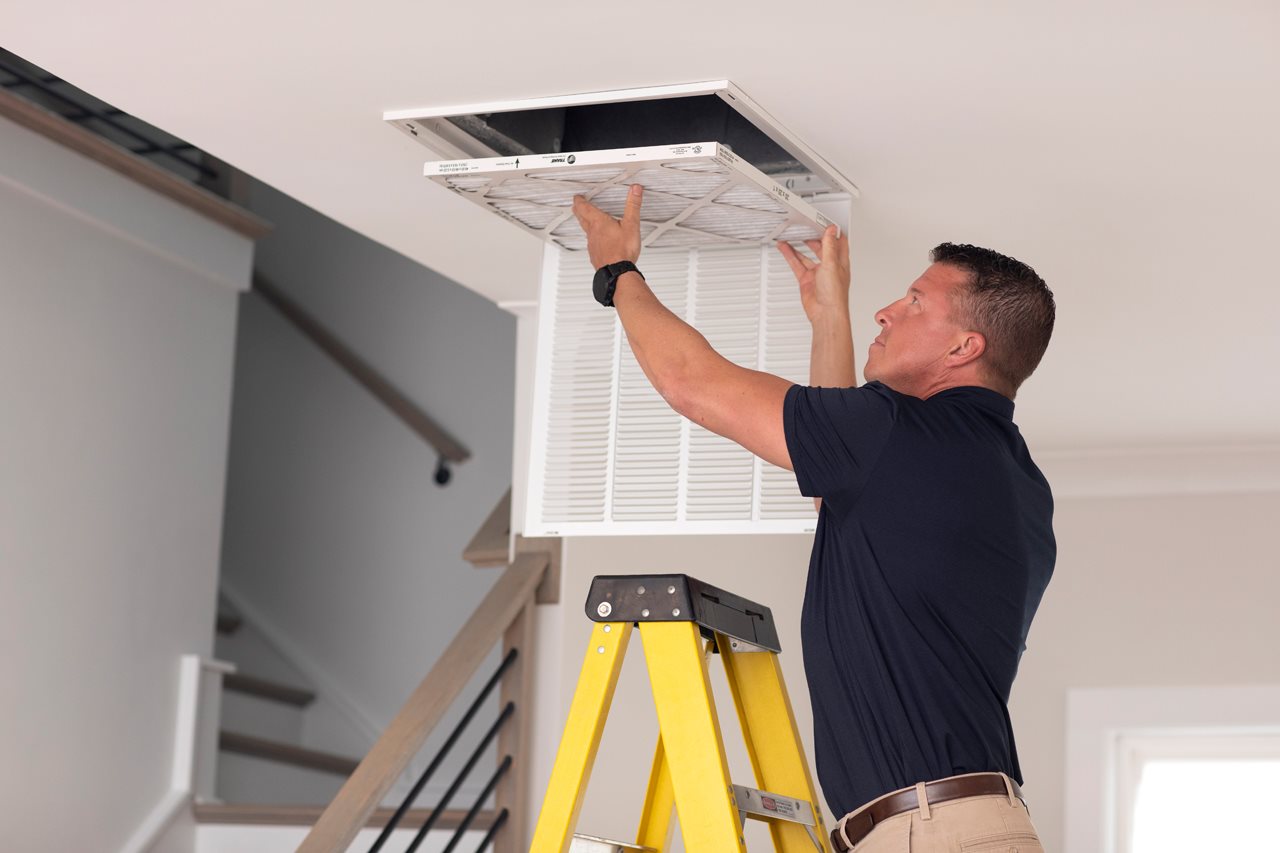
Change air filters frequently

When filters aren’t replaced, dirt and debris buildup results in more particles remaining in the air and decreased airflow. This makes your HVAC system work harder, reducing efficiency and raising energy bills. It’s crucial to regularly replace disposable filters that can be found in furnaces, air conditioners, air handlers, humidifiers or cleaners. Be sure to clean any filters that are not disposable.

How often should you change filters? Start by checking the owner’s manual for specific recommendations. Trane Residential, a leading residential HVAC brand, recommends changing them every 30-90 days.

Need help remembering to replace air filters or getting the correct size? Get a subscription! TraneFilter powered by FilterTime is a subscription service that ensures you’ll have the right-sized filter at the right time. Consider signing up for a subscription using the Trane Home app or at TraneFilters.com. You can set up filter reminders in your Trane Home app, and you’ll receive free shipping of replacement filters directly to your door.

Photo courtesy Trane Residential

Eliminate sources of indoor pollutants

Common sources include gas stoves, some cleaning supplies, paints, tobacco products and wood-burning fireplaces. When contaminant levels are high, effects from exposure can show up immediately such as irritation of eyes, nose and throat, headaches, dizziness and/or fatigue.

Use controlled ventilation

When sources of indoor air pollutants can’t be eliminated, consider supplying clean, fresh air to your indoor environment. Opening windows may allow for air exchange but won’t filter the incoming air or block allergens or asthma triggers like pollen.

The best way to ensure adequate fresh air is supplied to your home is to keep windows and doors shut and use a filtered mechanical ventilator to bring fresh air in, filter it through your HVAC system and expel the stale and polluted air outside.

Add a whole-home air-cleaning device

Exceeding what standard HVAC filters can do, a whole-home air cleaning device removes harmful fine particulates, smells, allergens, mold, and viruses from the air. For example, a Trane CleanEffects® Whole Home Air Cleaner can remove up to 99.98% of unwanted airborne pollutants as small as .3 microns.

CleanEffects is certified asthma & allergy friendly® by the Asthma and Allergy Foundation of America. For the over 65 million Americans with asthma and allergies, this certification mark guides consumers in identifying products more suitable for people with asthma and allergies. The asthma & allergy friendly® Certification Mark is awarded only to products scientifically proven to reduce exposure to asthma and allergy triggers.

Make it easier to live with your four-legged friends

Air quality is even more important if you have fur babies in your home, as pet dander is a common allergen. A Trane Residential survey of 2,000 pet owners conducted by OnePoll found the average pet owner spends 832 hours each year cleaning after their pets, and 3 in 4 say they clean their homes constantly since getting their furry friend.

When it comes to allergies, 45% of pet owners said they were happy to put up with some sneezing. If this sounds familiar, using a whole-home air cleaning device can improve your comfort while enjoying your furry family members.

Balance humidity

Maintaining your home’s humidity level between 35-60% is another factor in improving indoor air quality. Mold, dust mites, and other air pollutants tend to thrive outside that humidity range. You can monitor humidity levels through a reliable HVAC thermostat and help manage it with a whole home dehumidifier and/or humidifier.

Set up an HVAC service check

It’s important to test your home’s indoor air quality to identify pervasive issues like pollen or allergen introduction that can negatively affect you or someone with asthma and/or allergies.

If you’re experiencing health symptoms that may be related to bad air or just want peace of mind, have a local Trane Comfort Specialist near you test your home’s air. They can help you find solutions to reduce air pollutants and improve your home’s overall air quality.

In honor of National Indoor Air Quality Awareness Month, learn more and act now to breathe easier at Trane.com.

Railing 101: A guide to picking the perfect pairing for your deck

2023-10-25T13:51:00

(BPT) – When it comes to your deck, the railing is not just a functional necessity but also a crucial design element that can enhance the aesthetics and safety of your outdoor space. But, with so many options and industry jargon to decipher, choosing the right deck railing system can be daunting. Fear not. This article will guide you through the world of deck railing — from spindles to solar caps — to help you make informed decisions that suit your style and practical needs.

Common railing components

Understanding the parts of a deck railing system will help you navigate the terminology associated with different options.

Top Rail

This horizontal component — also called the handrail — sits on top of the railing system providing stability while also making a style statement. Top rails come in a variety of styles from traditional crown top (shown here) to more contemporary, minimalist designs.

Cocktail Rail

Also known as drink rail, cocktail rail is a popular option among homeowners who like to entertain. This application uses a deck board as a top rail to create a flat surface ledge at just the right height for holding drinks and plates.

Bottom Rail

The bottom rail is the horizontal piece that runs along the bottom of the railing system to hold the balusters or infill in place.

Balusters

Often referred to as spindles, balusters are the vertical components between the top and bottom rails that provide support and prevent small objects, pets and children from slipping through.

Infill

Railing infill comes in a range of styles from traditional vertical balusters to horizontal rods or cables. Glass and decorative mesh panels (shown here) are other options.

Posts

These are the larger, more substantial vertical pillars typically placed at corners and intervals along the railing to serve as anchor points for the system. They provide structural support and can be decorative elements as well. Posts can be made from wood, metal, aluminum or composite material. In some cases, they come with sleeves that slide over wooden posts to add a decorative touch.

Caps

These optional decorative pieces can be placed on top of railing posts to add a finishing touch and extra protection. Caps come in a range of shapes and styles, including LED and solar-powered options that light up to enhance ambiance and safety at night.

Railing material options

While wood remains a classic choice for deck railings, it requires regular maintenance to prevent rot, warping and fading. For a more on-trend look with less hassle, consider the following options.

Metal

Metal railings, such as aluminum and wrought iron, provide durability and a sleek, modern appearance. They require less maintenance than wood and are known for their strength. Metal railings can be customized with various finishes and designs to match your aesthetic preferences.

Composite

Composite railings combine the best of both worlds — the appearance of wood with the durability and low maintenance of plastic and metal. These railings are resistant to rot, insects and fading, making them a popular choice for busy homeowners.

Glass

Perfect for decks with scenic views, glass railings offer safety and style. Tempered glass is commonly used for its strength.

Finding Your Perfect Pairing

Selecting railing should be fun, but it can also be overwhelming considering the wide array of available options. To simplify things, use one of the following approaches:

  • Coordinate – Choose railing in the same shade as your decking for a well-coordinated look.
  • Contrast – Create visual impact by pairing your decking with railing in a contrasting but complementary color.
  • Customize – Mix colors and materials, such as combining dark aluminum railing and balusters with white composite posts for a dramatic, distinctive design.

For perfect pairings, Trex offers a Decking & Railing Duos tool on its website, which features designer-curated decking and railing combinations.

Now that you’re familiar with the various deck railing options and common terms, you can confidently embark on your deck project. Remember that the right deck railing not only enhances safety but also adds personality and charm to your outdoor space, making it a place where you’ll love to spend time for years to come. For more information about deck railing, visit Trex.com.

5 Steps for a Successful New Flooring Installation

2023-10-20T08:41:00

(BPT) – When it comes to giving your home a fresh, new look, few projects are as transformative as a flooring installation. Whether you’re tired of that old carpet or seeking to enhance your living spaces, the journey to a new floor can be both exciting and daunting. To ensure your floor remodeling project meets your expectations, follow these five essential steps:

1. Select the Best Flooring Type

What’s the best flooring? The perfect flooring type suits your lifestyle and aesthetic preferences. With a wide array of flooring materials available, the decision can be overwhelming. From the warmth of hardwood to the practicality of laminate, each type has its unique advantages and drawbacks.

In a recent survey by Modernize Home Services, most homeowners — 16% of total respondents — planning a flooring remodel project in the next 12 months intend to choose laminate. It’s a top choice for many due to laminate floor durability and affordability. Hardwood and tile floors were tied closely behind with 15% each.

To make an informed choice, explore Modernize’s comprehensive guide to flooring types. This resource, available at no cost, offers a clear summary of various flooring types and includes a helpful quiz to assist homeowners in making the perfect selection.

2. Research the Cost of Flooring Installation

One of the most crucial aspects of planning a flooring project is understanding the cost involved. The expenses can vary based on factors like your location and the specific flooring materials you choose. So, it’s essential to research local flooring installation costs to set a realistic budget for your project.

To gain a better understanding of the cost of flooring installation, read Modernize’s guide to flooring costs.

3. Identify Skilled Contractors for Flooring

Selecting the right contractor for your flooring project is as vital as choosing the flooring material. A skilled and experienced professional can make a big difference in the quality of the installation. Look for contractors who specialize in flooring projects and have a solid track record of successful installations.

Ask family and friends for recommendations and use an online contractor matching service, such as Modernize.com, to connect with experienced professionals in your area. Review floor remodeling professionals’ business profiles, such as this overview of Empire Today, to understand a flooring contractor’s experience and expertise before requesting a quote for your project.

4. Order Flooring Materials

Once you’ve chosen the best flooring type and identified a reliable contractor, it’s time to order the necessary materials. Depending on the flooring type you’ve selected, the required materials can vary. Work closely with your floor remodeling contractor to ensure all materials are ordered before your planned installation so that your project stays on schedule and is completed in a timely manner.

5. Prepare the Space for Installation

As you prepare for a new flooring installation, get your space ready. This involves clearing the area of any obstructions that might hinder the process.

While contractors typically handle moving large furniture, it’s the homeowner’s responsibility to pick up toys, shoes and small items from the floors. Additionally, items like standing lamps, decor and other smaller items should be moved to allow for a seamless installation process.

Flooring Renovation Return on Investment (ROI)

All flooring projects can potentially increase your home’s value, particularly when installing hardwood, tile or good-quality carpet. Modernize explains how to approach calculating the return on your flooring project and advises homeowners to maximize flooring renovation ROI by upgrading strategically, choosing materials that best balance aesthetics and value, and selecting neutral flooring colors that complement any decor style.

Enhancing the beauty and value of your home has never been more accessible. Learn more about how new floors can be a valuable investment on Modernize.com: Calculating the Return on your Flooring Project.

Creating a wellness sanctuary in the bathroom

2023-10-17T19:01:00

(BPT) – From waking up and setting the right tone for the day ahead, to winding down with a nighttime routine, a bath space has the potential to evoke feelings of deep relaxation. It’s a space that can be designed to generate a sense of tranquility and enhance well-being for the mind, body and soul. Starting and ending the day with self-care as a priority is the ultimate form of wellness.

Wellness for the senses

A great way to promote wellness is by engaging the senses in an immersive, vitalizing experience. Imagine a shower that soothes both the body and the mind, all while fostering a calming space. With the Brizo® Mystix™ Steam System, one can choose the lavish simplicity of the Elemental Experience or the holistic ambiance of the Transcendent Experience. Both are finely curated shower experiences that bring a sense of serenity to the bath. The Elemental Experience transforms the space into a restorative spa with its innovative Mystix™ Steam Generator. The Transcendent Experience combines all the benefits of the Elemental Experience with enhanced technology, plus a full suite of spa options: aromatherapy, chromatherapy and audiotherapy. These features rejuvenate the senses and elevate the shower to an entirely new level of indulgence, transforming the daily practice of showering into a self-care experience that one truly looks forward to as part of the day.

Personalizing the shower experience

Luxury is not one-size-fits-all; it’s found in the distinctive details. A personalized selection of products and features can elevate a shower from simple to grand. Whether selecting an essential oil to be dispersed with the steam, choosing a light color that soothes the mind, listening to a personal playlist through a connected app during a steam shower session — or all three — one can tailor the experience to fit the desires of the user. The variety of options and ability to customize these details ensures the shower fulfills these distinct wellness needs. The Mystix™ Steam System Transcendent Experience allows users to choose from seven different mood-enhancing lights, with each color creating a unique ambiance, and select from an array of five finely curated fragrances to transport the senses through the benefits of essential oils. Both inspiring and calming, these sensory elements work together to rejuvenate the mind and the body, undoing the stresses of the day. The resulting sense of harmony is one only a well-crafted steam shower can bring.

3 Backup Power Innovations For Home and On-The-Go

2023-10-17T11:01:00

(BPT) – Have you ever wished you could do more to harness the solar energy captured by your home’s solar panels? Have you ever wished your generator was quieter and didn’t smell so bad? Have you ever grappled with EV range anxiety or wanted additional backup power in your RV? If so, then this news is for you. Cast off the anxieties and annoyances! A better way is here.

Anker’s SOLIX F3800 Portable Power Station is the flexible, cost-effective and easy-to-install power system breakthrough in whole home (and EV) backup power the world has been waiting for. Tens of thousands of solar enthusiasts have already signed up to be the first in line for this power station. And with these three game-changing innovations in the mix, odds are the excitement is just going to keep on climbing.

1. Powerful output + AC coupling

This is the first power station to feature AC coupling, and it offers 6000W of AC power output to power most home appliances. It also provides 120V/240V dual voltage output, letting you run both standard and high-energy devices simultaneously.

Worried that 6000W might not cut it? Perhaps you’ve got a large home to power, or some seriously demanding equipment to run? No worries. This power station can be doubled up for a staggering total output of 12000W.

2. Extended backup power

In the past, limited battery storage has left a lot of otherwise interested folks wary of making the switch to solar. Now, you can put those fears to bed. A massive 3.84kWh internal battery provides ample backup power at the drop of a hat. Plus, by combining two power stations and up to 12 additional batteries, the average homeowner can get up to a week of backup power. That’s enough to see you through the longest recorded blizzard in U.S. history plus three days to spare!

3. Take it where you need it

However, not all power needs are stationary. And when you have big electricity demands on the go, you want a power station that can go with you. With a convenient suitcase design featuring a stowable handle and a set of large, sturdy wheels, the F3800 is always up for the trip.

EV owners, take note. Fear of losing power has prevented drivers from maximizing their road trips for far too long. Set yourself free with a power station that’s transportable, high-powered and easy to use. Just directly connect your vehicle’s charging cable — no additional grounding accessories required!

For RV owners out there, the F3800 can run all your appliances in the RV and power them for several days to ensure the enjoyment of your whole trip thanks to its built-in RV port.

Of course, if you’re looking for an even more portable, lightweight and super-fast power station, there’s no need to wait for the Anker F3800 to drop. Anker SOLIX C1000 portable power station was designed for small places, and is the perfect power accessory for winter emergency use or just to ensure your devices never run out of power during your festive celebrations. It is lightweight and has a fast-charging technology, compact design, plenty of ports to connect up to 11 devices at the same time, high voltage output (120 volts) and even smart app control to set power schedules.

Get an advantage with advanced solar solutions

The solar age is finally here, and those who take advantage of it have a lot to gain. No more lining up for gas to refill your generator after severe weather. No more EV range anxiety or complicated route planning. And of course, you can celebrate that big reduction in your carbon footprint thanks to a clean solar energy loop.

If that sounds like a good deal to you, head over to Anker.com/anker-solix to pre-order the F3800 today on Kickstarter.

How to protect your investment in tile by choosing the right mortar

2023-10-16T02:01:00

(BPT) – Tile is having a moment. Although you might argue tile has been around for thousands of years (and you’d be correct), today’s tile options for home design are more varied and more versatile than ever. For example, you can use concrete-look or metallic tiles for a modern industrial look, or porcelain tile (made from clay) in earth tones, blues or greens to embrace the nature-derived biophilic design trend. And those are just a couple of examples.

New options in terms of tile materials, colorways, shapes and sizes allow for a wide range of effects that can enhance any area of your home, from floors and counters to accent walls and more — not only bath surrounds or your kitchen backsplash. Because high-quality tile can be a big investment in your home improvement, it’s important to make the correct choice when it comes to one often overlooked material — the right mortar for the job.

The right mortar protects your tile

Which bonding mortar you choose depends on the specifications of the job, such as where it’s located, whether it’s horizontal (floors, counters) or vertical (walls), as well as the size and weight of the tile you’re using. Other consideration include the budget and timeline for your project. Using the right mortar the right way will ensure that your tile stays in place and helps prevent breakage, no matter what type of tile or project you’re planning.

To help you understand your mortar options, the experts at Custom Building Products offer tips for tile installation and how to choose the best mortar for the job.

Standard projects on a budget

If your project is straightforward and doesn’t involve large format tile, and budget is a priority, a good quality choice is VersaBond Professional Thin-Set Mortar. You can use this cost-effective mortar for projects ranging from plywood subfloors to porcelain and glass tile installations. It has outstanding adhesion and good bond strength, making it suitable for interior and exterior floors, countertops and walls.

Large-format tile projects

If you’re considering tile that measures at least 15 inches long, this is considered a large-format tile. This size is becoming increasingly popular for a wide array of residential and commercial projects, used in approximately 80% of tile projects today. Because of their larger size and greater weight, they require specially formulated mortar. VersaBond LFT is a non-sag, non-slump mortar specifically designed for use with large-format porcelain, ceramic and natural stone tile. This mortar supports large and heavy tile, and is suitable for internal and external floors and walls. You can also use this mortar for tiling with in-floor heating systems.

Projects on a tight deadline

If your tiling project needs to be completed as quickly as possible, VersaBond LFT RS mortar will help you fast-track its completion. This rapid-setting, non-sag, non-slump, polymer-modified mortar can be used for large-format porcelain, ceramic and natural stone tile. It features a non-slumping formula to eliminate lippage so the surface remains flat. The biggest benefit is that it cures fast, so you can get started on your grout two hours after installation.

How to avoid trowel and error

Once you’ve got your tile and mortar selected, it’s also crucial to apply the mortar correctly. Here are basic tips to help you or your contractor avoid common errors so your tile installation looks great and lasts for many years to come.

1. Before applying mortar, the surface must be flat, sound and clean.

2. Comb trowel ridges in a straight line, all in the same direction, for the best results and durability.

3. For rectangular tile, trowel ridges should go along the short edge of the tile, which allows for better air release when you apply the tile.

4. Research the right trowel size for the selected tile. Larger tiles often require larger trowels.

5. For large tile or any tile on exterior surfaces, back-buttering tile is recommended. Do this by using the flat side of the trowel to add a smooth layer of mortar to the back side of the tile.

Following these tips, you should be able to correctly install aesthetically pleasing tile to add beauty and functionality to any space in your home.

Ready to get started? To learn more about tile mortar, including tips and tricks for application, visit CustomBuildingProducts.com.

The Top 10 Renovations That Increase Home Value

2023-10-16T14:01:00

(BPT) – As property prices and mortgage rates rise, sprucing up your existing home instead of hunting for a new one may be more appealing.

Before you start making plans and lining up local contractors, think about: What’s the return on investment? Bathroom and kitchen remodels may turn heads if you’re looking to sell, but don’t underestimate the value of fixing up your home’s essential systems.

Whether you’re putting up a “For Sale” sign, doing some essential repairs, or just simply upgrading, The Home Depot’s Home Services can help you determine what really matters when it comes to boosting your home’s value.

5 easy ways to upgrade your outdoor space this fall

2023-10-14T05:01:00

(BPT) – As the temperatures cool but it’s still pleasant outside, now is the perfect time to improve your backyard. Fortunately, there are many affordable projects that can make your outdoor area more attractive and enjoyable this autumn — and for many seasons to come.

Here are five simple upgrades you can make to enhance your outdoor space.

1. Create a warm focal point

Fall is a delightful time to gather around a fire to chat, toast marshmallows and enjoy the season. You can find many affordable options to add a simple fire pit, such as simply purchasing a low-cost free-standing fire pit.

You could also build your own fire pit, using stones or cinder blocks. An online search will lead you to dozens of ideas. Be sure to follow safety instructions such as keeping your fire pit at least 10-25 feet from your home or other structure and away from overhanging trees, and creating a non-flammable base.

Note: Check with your local municipality for regulations around fire pits, as many areas require permits.

2. Light it up

Today’s choices for outdoor lighting are numerous, from solar lights to LED lights, and include string lights, path lights or downlighting installed on your home’s exterior. Improving your outdoor lighting not only makes your space more attractive and extends outdoor entertaining into the evening hours, but also provides additional safety and security for your home.

3. Have it made in the shade

Building a simple pergola is one great way to add a little shade, define an area of your outdoor space and create visual interest. You can find many free building templates for pergolas in a variety of sizes and styles on the internet. Adding climbing plants or flowering vines to your pergola makes it even better — improving shade and making the space feel like a natural sanctuary.

4. Embrace your favorite tree

Another fun DIY project is to create a wooden bench that goes around a favorite tree in your yard. This creates a cozy spot for reading or hanging out that kids especially will enjoy. Most templates online are hexagonal (6-sided) in shape and not difficult to construct. You can then make or buy cushions or pillows so it’s extra comfy.

5. Lead them down the garden path

Although paths made from materials like brick and stone are attractive and durable, they can also be expensive and challenging to install. An easy and affordable alternative is building a path yourself, using plastic forms and pre­mixed packaged concrete like Quikrete® Crack Resistant Concrete. You can also add Quikrete Liquid Cement Color to easily customize the color and style of your path so it’s exactly how you want it.

Using Quikrete Walkmaker forms, select the style of path you want, including natural-looking Country Stone Pattern, Running Bond Brick, European Brick Block or Basket Weave Brick pattern. The forms are 2 feet by 2 feet and require one 80­-pound bag of concrete, so you can work on your path at your own pace, one form at a time. You can customize your path further by incorporating liquid colors, stains and/or embedding gravel or other small aggregates into the concrete.

Steps for laying a concrete path:

  • Remove sod and soil to the desired width, shape and length of your path, keeping the ground as flat and level as possible.
    Thoroughly mix concrete and water in a wheelbarrow with a garden hoe or shovel, or in concrete mixer, according to the directions on the bag.
  • Lay the form at the beginning of your path and fill with the concrete mix, pressing the concrete firmly into corners with your trowel.
  • Promptly remove the form and smooth the edges of the path with your trowel before the concrete mix hardens. For a nonslip finish, brush the surface with a stiff broom.
  • Continue by rotating the form a quarter turn and placing it against a completed section of path. Then fill with concrete mix, remove the form and smooth the surface. Repeat this process until your path is complete.
  • To create a curved walkway, after removing the form from a freshly poured section of path, reposition the form in the direction of the curve and press down to slice off the corner. Use a trowel to consolidate and smooth cut-off edges.

Note: When working with cement products, always wear eye protection and gloves.

For more tips on laying a concrete path, including step-by-step how-to videos for this and other home projects, visit Quikrete.com or their Facebook page.

Using some of these tips this fall, you can transform your outdoor space into an even more attractive oasis for entertainment, enjoyment and relaxation.

5 fall to-dos for a successful spring deck build

2023-10-04T09:15:00

(BPT) – As temperatures turn cooler, it might seem premature to think about springtime outdoor projects, but when it comes to planning a spring deck build, now is actually the perfect time to start. The fall and winter months provide an ideal window of opportunity to lay the groundwork for a successful and stress-free spring deck construction project. Here are some key steps and considerations to ensure your new deck will be ready to enjoy when the flowers start to bloom.

1. Define your vision

Every successful deck project begins with a clear vision. Spend some time this fall and winter envisioning your ideal deck. Consider its purpose — will it be a space for outdoor dining, relaxation or entertainment? Think about the deck’s size, shape and design elements. Gather inspiration from home improvement magazines, social media platforms and websites like Decks.com to help refine your vision. Then, utilize online tools, like those offered by the outdoor living experts at Trex, to bring your vision to life. Digital tools, such as their AR Visualizer and Deck Designer, can help to further define details. You can also find a wide array of ready-made deck plans online that offer ideas and inspiration.

2. Lock in labor

One of the first things you’ll need to decide is whether you plan to build the deck yourself or hire a professional. If you have the skills to DIY, take advantage of online resources, like Trex Academy, for expert tips and step-by-step instructions to help get the job done. If you plan to work with a contractor, fall is an excellent time to start the vetting process. Quality deck builders are often in high demand and tend to book out months in advance. Securing a contractor in fall ensures you’ll have a skilled professional ready to begin work when the weather allows in the spring.

3. Plan for permits

Deck construction often requires permits, depending on your local building codes and neighborhood associations, if applicable. Take advantage of the fall and winter months to research local building codes and obtain any necessary permits and approvals. This process can be time-consuming, so getting a head start will ensure that you don’t face any unexpected delays come spring.

4. Set your budget

Setting a budget early gives you time to make any necessary adjustments and ensures you won’t be caught off guard by unexpected costs once installation begins. Be realistic and consider all potential expenses, including labor, permits, substructure materials, decking, railing and any additional features or amenities you might want to include, such as lighting, an outdoor sound system or an under-deck drainage system. Online resources like the Trex Cost Calculator can help to ensure your vision is financially feasible. Simply answer a few questions about your space, like the material you plan to use and the deck dimensions, to determine an estimated price range for your project.

5. Research materials

The choice of materials for your deck is crucial as it directly impacts both the aesthetics and longevity of your outdoor space. Fall is an ideal time to research the range of available options. Consider factors like durability, maintenance requirements and sustainability when making your decision. Trex composite decking, for instance, is made from 95% recycled and reclaimed materials and never needs to be sealed or refinished like wood. The brand’s latest innovation, Trex Transcend Lineage, even features heat-mitigating technology that keeps the boards cooler under the sun than other composite offerings. Many above-ground decks require railing, so be sure to take that into account as well. Railing options are myriad and the costs vary widely, so planning ahead ensures you have time to make the choices that are right for your project and your budget.

Planning ahead for a spring deck build during the fall and winter months is a wise decision that can save you time, money, and stress in the long run. By following these steps, you’ll be well-prepared to embark on your deck construction project when the warmer weather arrives. With careful planning and attention to detail, your dream deck will soon become a reality, providing you with a beautiful and functional outdoor space to enjoy for years to come. For more outdoor living inspiration, visit Trex.com.

Winter home checklist: 10 ways to winterize your home and save money

2023-10-04T09:03:00

(BPT) – The freezing temperatures, ice and snow that come with the winter season will be here before you know it. Instead of waiting until a house emergency arises during the cold winter, take time in the fall to start winterization projects.

For most homeowners, winter means colder weather and rising energy bills, too. To help stick to your budget while keeping your home warm and safe this winter, Oncourse Home Solutions developed this checklist to help you get your home winter-ready before the first snowfall.

1. Seal those drafts. Drafty doors and windows allow heat to escape — making your heating bill soar. Check windows, attic, walls and crawlspaces for noticeable drafts. Then add weather stripping, insulation or caulking to problematic areas to prevent the loss of heated air.

2. Keep appliances running like a dream. Winter can put your appliances to the test, especially if they’re not properly maintained. Regularly cleaning out dust and debris from large appliances, including your refrigerator, will ensure optimal performance so you don’t have to worry about unexpected breakdowns. Oncourse Home Solutions suggests homeowners have a yearly furnace ‘tune up’ maintenance appointment with a professional to ensure potential problems can be caught early and taken care of before they result in an untimely (and expensive) breakdown.

  • Pro Tip: Check with your provider, as they may offer plans designed to take care of your appliances. This can reduce your financial burden to cover repair emergencies.

3. Switch to a smart thermostat. A programmable smart Wi-Fi thermostat allows you to set different temps for different times of day, right from your phone. By lowering the temp when you’re out of the house or asleep, you can save a significant amount of energy and money.

4. Embrace natural heat. Blinds, shutters and curtains don’t just keep light out; they can help keep heat in, too. Open window treatments during the day, allowing the sun to heat your home naturally. When the sun goes down, close curtains and blinds to trap warmth inside.

5. Check ceiling fan direction. Did you know your ceiling fan can provide both cool and warm air? During the winter, set your ceiling fan blades to spin clockwise. This forces the fan to push warm air back down into your living space. That can help keep your thermostat at a reasonable setting, giving your HVAC system a much-needed break.

6. Let there be LED. Swap old incandescent light bulbs for energy-efficient LED bulbs. Not only are they longer-lasting, but they also use significantly less energy. You’ll save money while illuminating your home with brighter, more sustainable light.

7. Clear around vents. If certain rooms feel cooler than others, ensure you don’t have blocked vents. Rugs, curtains and furniture can block airflow from any vent. When this happens, warm air from your heating system can’t reach your family.

8. Check your home’s exterior. Even though you may not spend as much time outdoors during winter, it’s a great time to check for damage to your home’s exterior. Look at your roof, gutters and downspouts to ensure things are in good shape. If you notice missing or damaged shingles, or any gutters or downspouts pulling away from your home, those are issues that need attention immediately. Putting off maintenance and repairs only makes it worse — and hurts your wallet.

9. Be prepared. Plan for the unexpected by keeping an emergency kit stocked with non-perishable food, blankets, flashlights, batteries, drinking water, a fire extinguisher and first aid kit. Placing shovels, salt and snow blowers in an easily accessible location can also help you quickly clear snow and ice from heavily trafficked areas like walkways and driveways.

10. Protect your pipes. Freezing pipes can cause major headaches (and leaks!) during winter. To protect homeowners from unexpected costs, home protection providers like Oncourse Home Solutions have homeowners’ backs when it comes to safeguarding their home. Their protection plans offer coverage for pipes and more, so you can rest easy knowing that unexpected damage may be taken care of without breaking the bank.

Remember, these tips are just the start of your winterizing journey. Each home is unique, so always consider partnering with home protection and service providers like Oncourse Home Solutions, formerly operated as Pivotal Home Solutions and American Home Solutions, a leading home protection provider focused on protecting homeowners from unexpected costs, and providing flexible services for home repairs, maintenance and improvement.

With the amount of stress and tasks that naturally come with homeownership, especially during the winter months when bills tend to rise, having a thoughtful partner that provides peace of mind is critical. With a little bit of effort and some smart choices, you can face winter confidently, knowing help is just a call away. Visit OncourseHome.com to learn more.