Tips for Hazard-Free Holidays

2022-11-18T15:49:00

(BPT) – The holiday season is just around the corner, which means it’s time to start making memories in the kitchen with your loved ones. Whether you plan on preparing a few family favorites or attempting an entire multi-course meal, it’s important to be mindful of kitchen fire safety. According to the National Fire Protection Association (NFPA), three times the number of home fires occur on Thanksgiving Day than any other day — with Christmas Eve and Christmas Day close behind.

First Alert, now part of Resideo Technologies, Inc., and First Alert brand ambassador Eva Longoria provide these kitchen fire safety tips to help keep you and your loved ones safe this upcoming holiday season:

1. Equip Your Home
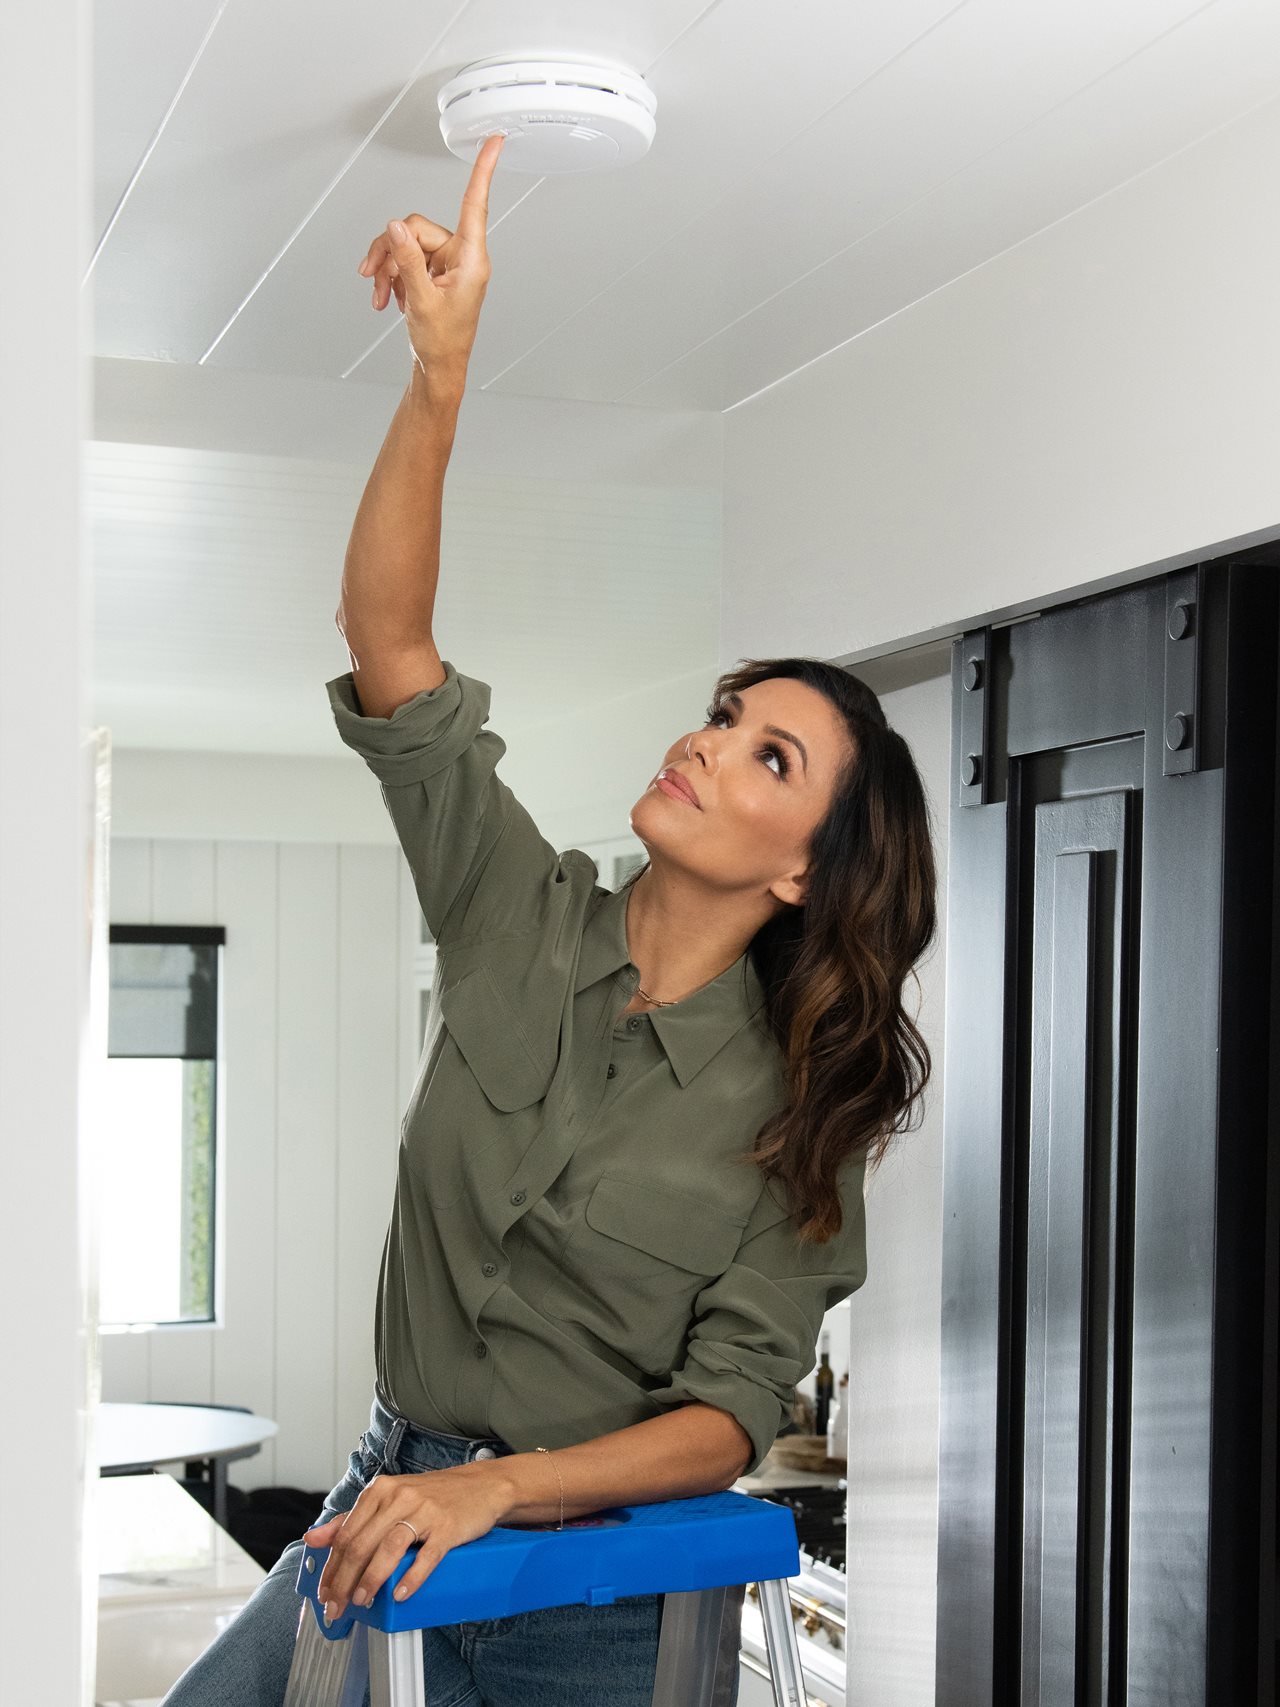
The first step in helping to create a safer home is taking the time to ensure you have working smoke alarms throughout your home. According to the NFPA, three out of every five home fire deaths occur in homes without properly working smoke alarms, or no alarms at all.

“We all lead busy lives, but it’s essential that people understand how to protect themselves from the dangers of fire and CO poisoning,” explained Longoria, who has teamed up with First Alert to encourage families to install proper protection, discuss whole home safety and develop their own fire safety plans.

The NFPA recommends that smoke alarms be installed on every level of your home, including the basement, and inside every bedroom. Smoke alarms should be installed high on walls and ceilings and at least 10 feet away from appliances to help minimize false alarms when cooking.

Once alarms are installed, maintenance is key. Testing alarms takes mere moments and is simple as pressing a button and waiting for a beep. You should test alarms regularly and replace alarm batteries at least every six months. To help eliminate late-night battery chirps and battery replacements for a decade, upgrade to First Alert 10-Year Sealed Battery Smoke & Carbon Monoxide Alarms.

2. Keep Cooking Spaces Free of Clutter
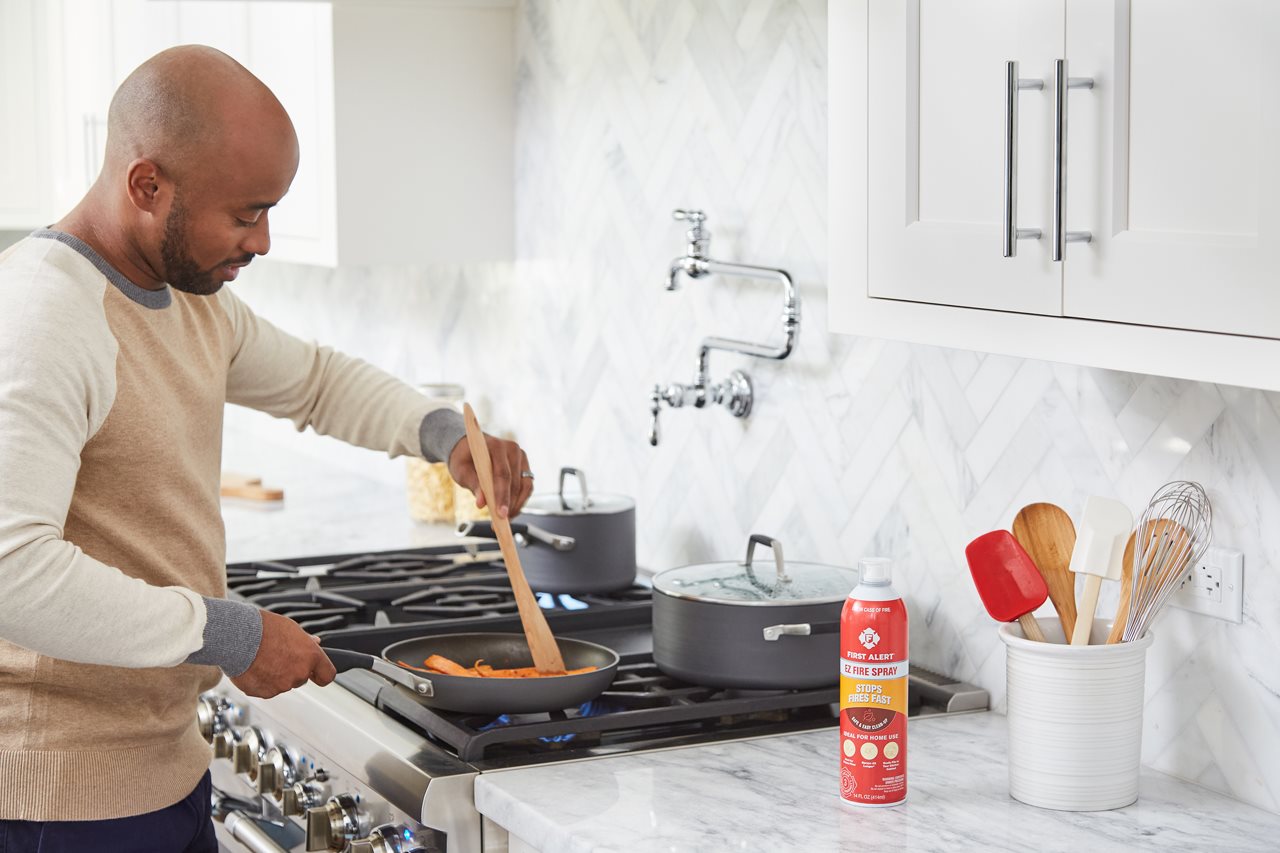
With lots of extra helping hands in the kitchen during the holidays, it’s important to ensure that the cooking area is free of any clutter to help avoid any mishaps. Be sure to keep any flammable items — like oven mitts, potholders, plastic or paper bags, and food packaging — away from any kitchen appliance that generates heat. Make a habit of regularly cleaning cooking surfaces to prevent grease buildup since grease is highly flammable and will increase the risk of igniting a fire. It’s also important to be mindful of the clothes you’re wearing. Avoid loose-fitting items and dangling sleeves that could potentially catch fire.

3. Don’t Leave Cooking Unattended

With all the holiday cooking coupled with the extra commotion, multitasking in the kitchen is unavoidable. Although you may be able to multitask, you should never leave food that is frying, cooking or grilling unattended. According to the NFPA, unattended cooking is the number one cause of home fires in the U.S. If you must step away, turn off the stove or ask another adult to keep watch for you. Check on food in the oven frequently and set a timer to remind yourself that the stove or oven is still on. You should also avoid using the stove if you’re under the influence or are feeling tired.

4. Keep Children Away from Stovetops

From scalding liquids to dangling electric cords, there are many dangerous things a child can snatch from the kitchen counter. Maintain a safe cooking environment for little ones by placing hazardous items toward the back of the counter and out of a child’s reach. While the holidays call for all hands on deck in the kitchen, keep children at least three feet away from the stove while in use or cooking to avoid accidental scalds or burns.

Educate your little ones on home fire safety and foster conversations around keeping each other safe in an event of a fire — both during the holidays and year-round.

5. Have a Fire Extinguishing Device on Hand
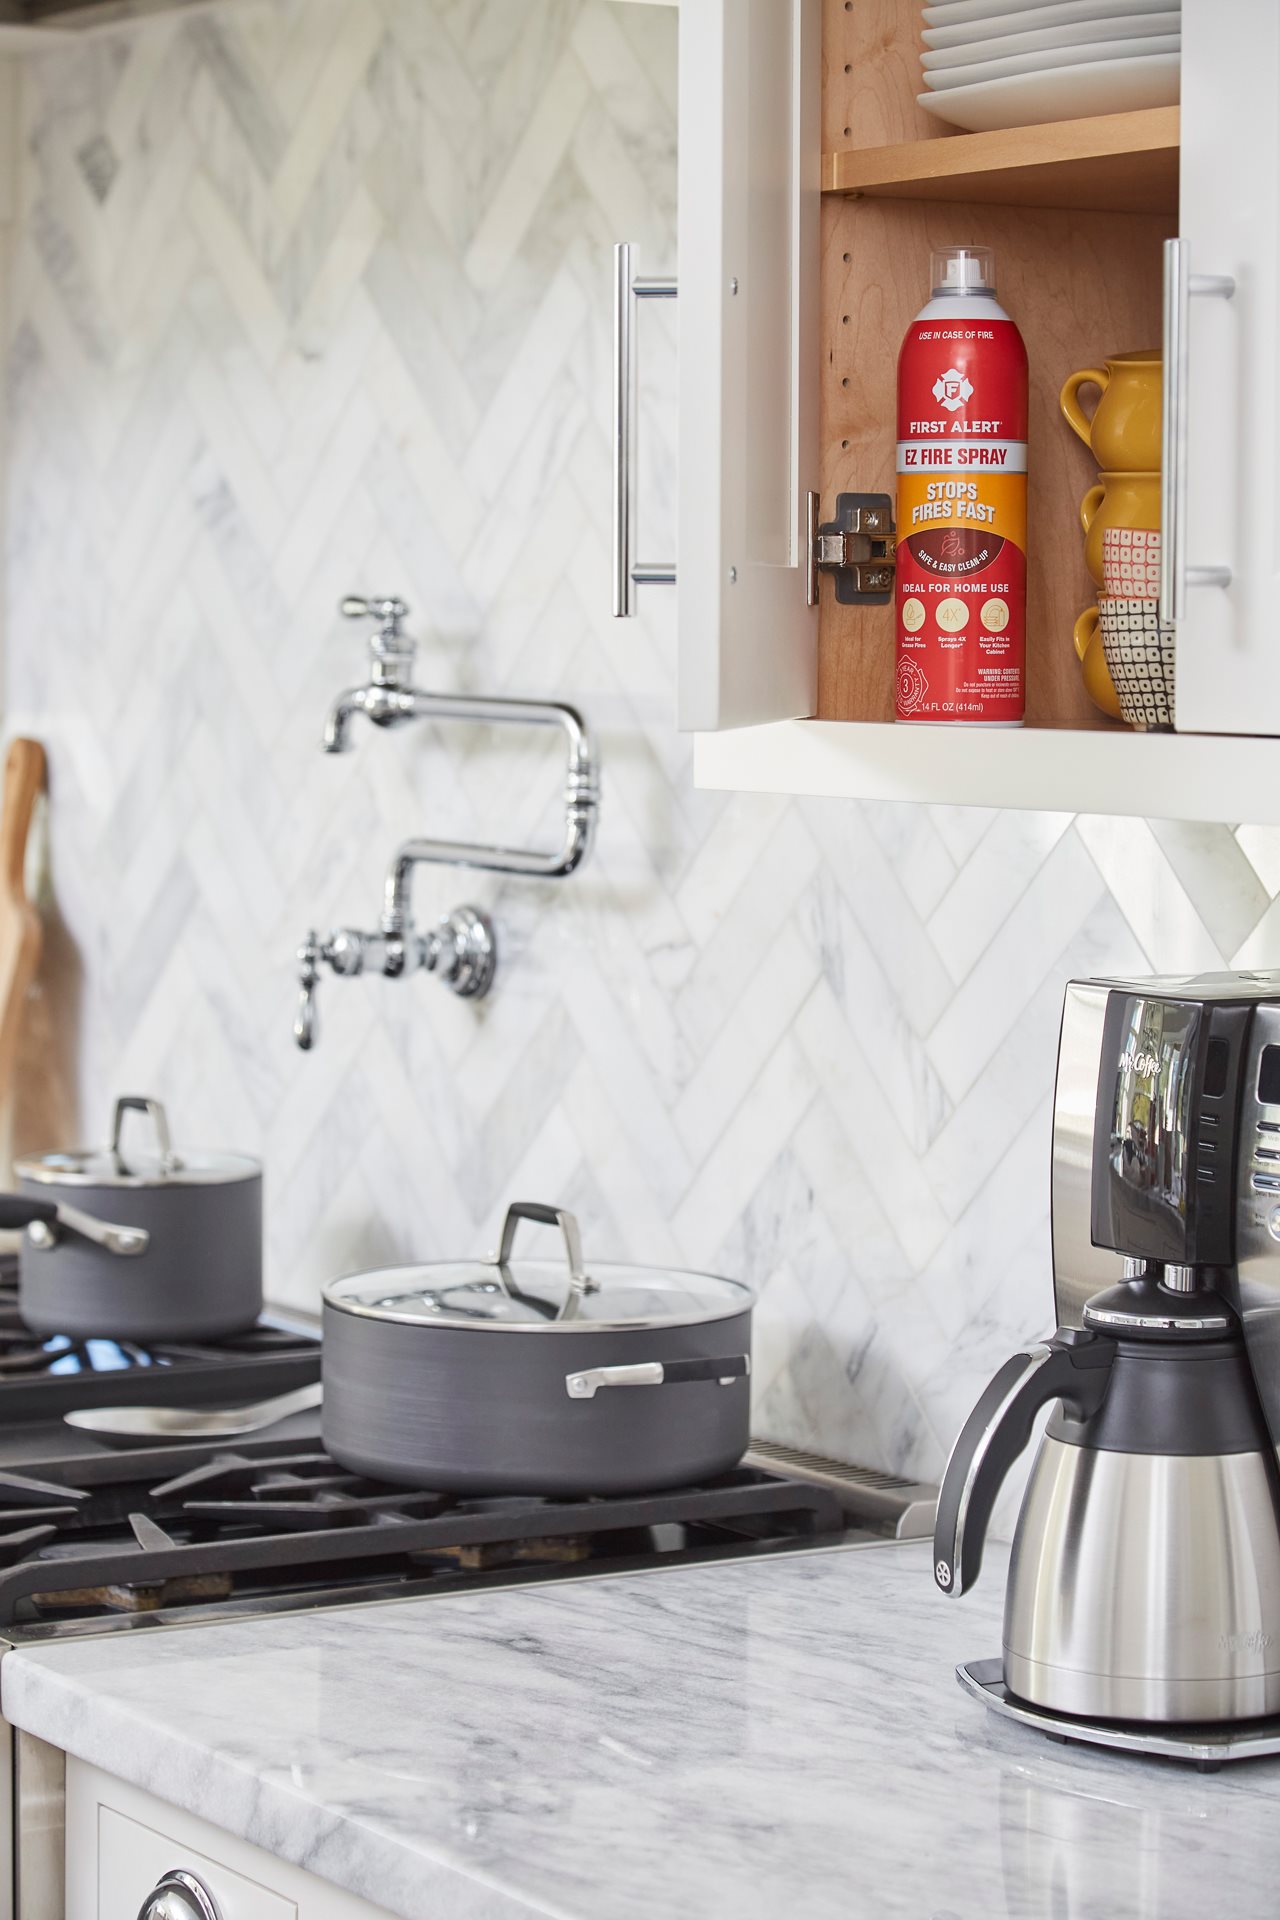
Since the kitchen is a busy and essential part of the household during the holidays, it’s important to have proper precautions in place. The NFPA reports that ranges and cooktops were involved in 61 percent of kitchen fires, proving the importance of keeping a fire extinguishing device easily accessible to stop fires before they can spread.

For an easy-to-use alternative to a traditional fire extinguisher, have the First Alert EZ Fire Spray within reach. Its lightweight, spray-can design has no pins or levers, making it easy to hold, carry and use. Just point and spray to stop fires fast.

“Ensuring the kitchen is equipped with easy-to-use tools will help keep you one step ahead in fire safety,” said Ashley Gocken, a First Alert safety expert with Resideo Technologies. “The EZ Fire Spray is easy to keep on the kitchen counter or in a nearby cabinet, and its small size also makes it convenient to stash away in key areas throughout the home, like the garage or basement.”

For more tips on protecting the ones you love, visit FirstAlert.com.
Plan ahead for your perfect deck

2022-11-17T07:01:00

(BPT) – A big part of building your dream deck is the planning. In fact, a typical deck project can take six months (or more) from inspiration to installation. To help make your dream a reality, the following are tips for keeping your deck project on track, on trend and on budget.

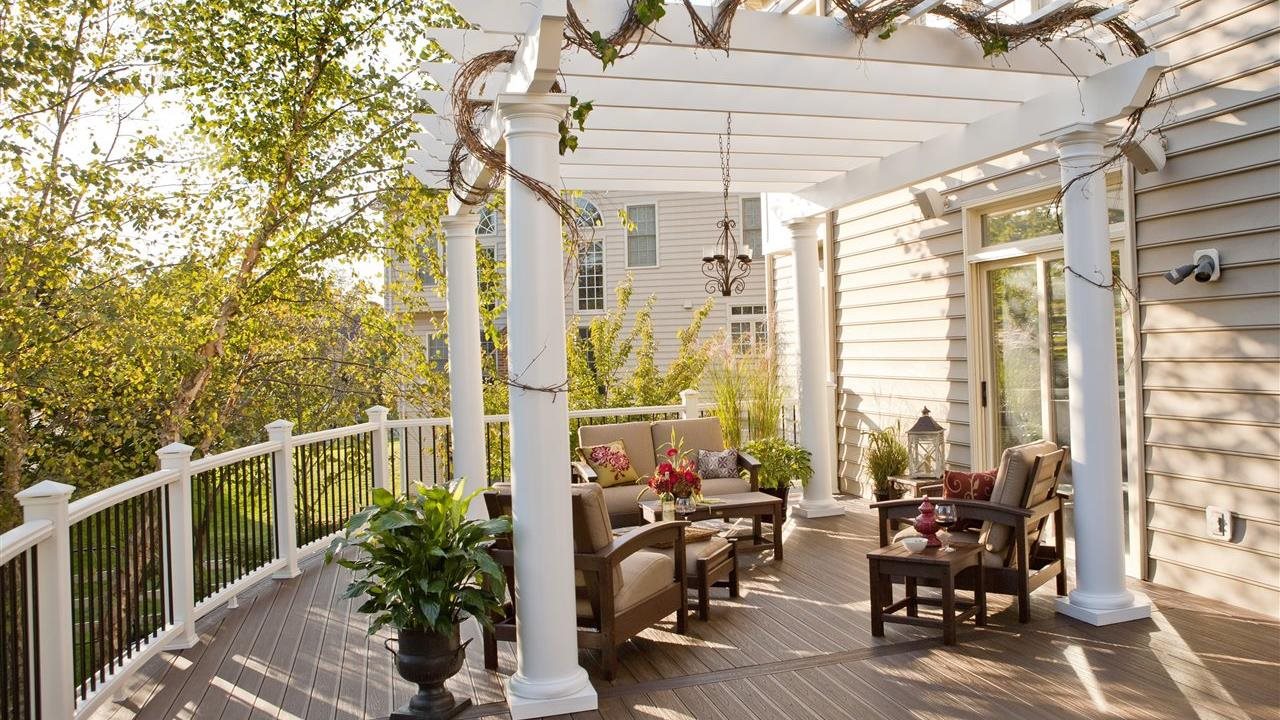
Visualize the Possibilities – When it comes to your deck’s design, there are countless possibilities — from simple ground-level styles to more elaborate multi-level decks. Ultimately, a deck should be designed around how you plan to use it. In addition to function, consider your views, neighbors, the prevalence of sun or shade, as well as the entrances and exits from the home and into the yard. All these factors will have an impact on your deck’s size and configuration. Once you have a general design in mind, there are great tools available to help bring your visions to life. Trex offers an AR visualizer app that allows users to experiment with different decking shapes, board colors and railing combinations against the backdrop of your own house. There are also hundreds of downloadable deck plans and other resources available online to help guide you through your deck building journey.

Consider Codes and Permits – Consult your state, county or city offices regarding building code requirements and to learn what permits are necessary for building a deck in your area. Factor permitting into your project timeline so that progress is not stalled by waiting for inspections and approvals. If your neighborhood has a homeowner association (HOA), make sure you understand any rules regarding deck size, color, product type or design. And don’t forget to check with your local utilities to locate any underground cables, wires or pipes before construction begins. Your deck builder should be able to help with this, or you can call the North American One-Call Referral system at 888-258-0808 if you plan to DIY.

Be Mindful of Materials – When choosing materials for your deck, think long term. It’s important to choose quality materials that will withstand years of wear and tear from both weather and use. High-performance, wood-alternative composite decking is resistant to fading, staining, scratching and mold. And, unlike wood, it never has to be sanded, stripped or stained, resulting in less maintenance and more time for outdoor enjoyment. High-performance Trex® composite decking is also sustainably made from 95% recycled and reclaimed materials, making it an eco-conscious choice that feels as good as it looks. Sample boards may be ordered online so you can see firsthand how different colors and collections work with your home’s architecture and style.

Budgeting and Beyond – When it comes to budgeting for a new deck, keep in mind that several factors will affect costs, including the size, shape and elevation of the deck, along with labor and the materials you choose. For the latter, you can use an online cost calculator to get a rough estimate for material costs based on the size, substructure and decking products being considered. As for labor, do your research and request multiple quotes to ensure you find the best contractor for your project and budget. Keep in mind that quality deck builders book projects well in advance and often have a waiting list by spring.

With proper planning, it’s possible to make all your outdoor living dreams come true. For more information and inspiration, visit Trex.com/Academy.

A Well-Designed Shower Experience

2022-11-15T07:01:00

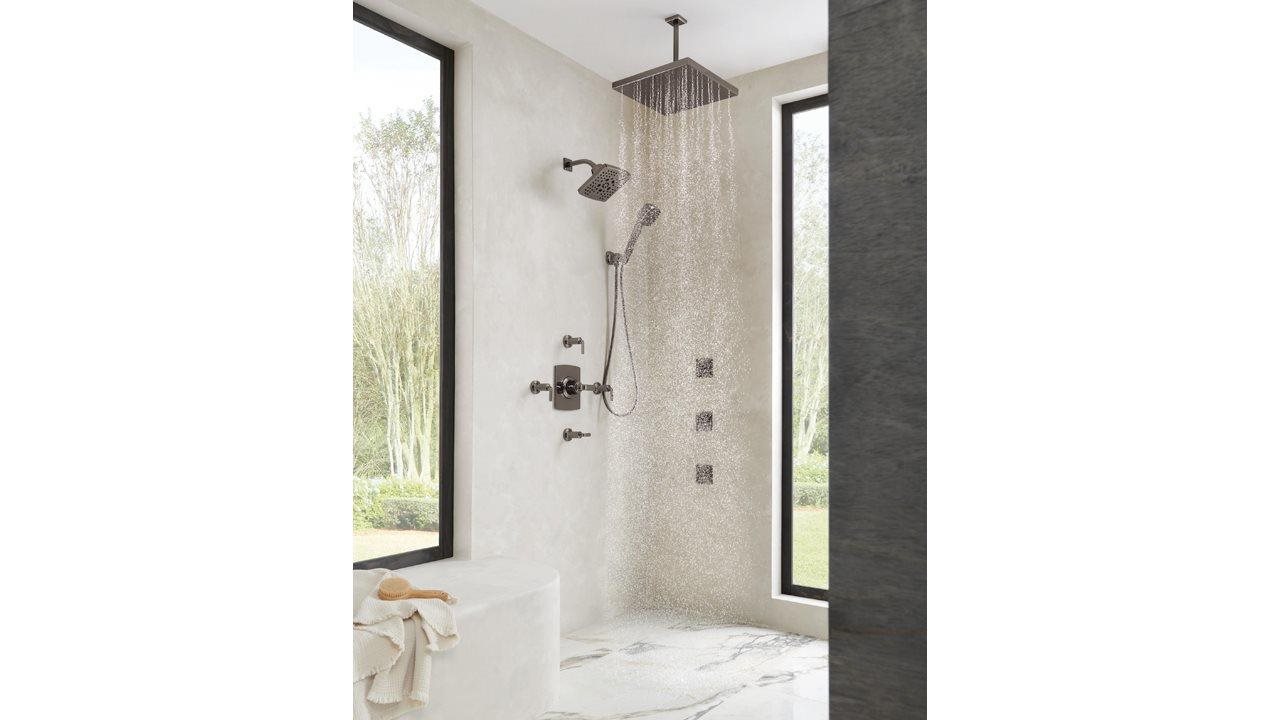
(BPT) – The bathroom has become a multi-functional space — a place to create daily experiences that cleanse, relax and rejuvenate. Designing this space provides the opportunity to select features and fixtures that bring both art and function to the bathroom. The shower, especially one with a unique waterflow, can act as a living art piece, creating an immersive experience that feels as amazing as it looks.

Indulgent Shower Experience

To maximize the shower experience, incorporate technology that brings water to life and transforms a shower from a mundane task to a serene and reviving part of the day. Carefully look at every feature when selecting a shower head — from the spray to the coverage. Each element should come together to create a shower worth looking forward to each day.

The new 14” Raincan Shower Head from the Brizo® Essential™ Shower Series features an H20kinetic® Drenching Spray that utilizes water-sculpting chips to create thousands of large droplets that pour down in alternating patterns. The shower head provides rich volume and full coverage that replicates water found in a tropical rainforest, thus creating a uniquely recharging shower experience.

Refined Luxury

To elevate the bath space and achieve a look and sense of heightened relaxation, mix textures, unexpected tile patterns and earthy colors. Select fixtures with simple, clean details that bring the space together and create a cohesive, lavish design, to provoke a feeling of serenity. Look to shapes that complement the space and bring a sense of beauty to function. The 14” Raincan Shower Head is available in a Linear Round style, bringing new refinement to timeless simplicity. It is also available in a Linear Square style that elevates the shower through striking clean lines and geometric angles. Either shape creates a breathtaking statement that can live beautifully in any bathroom.

Conscientious Style

Make design choices that are as sustainable as they are aesthetically beautiful to create a bath environment that is both functional and intentional. Select fixtures with water-saving features and high-functioning, eco-friendly products that merge technology with design. Use H20kinetic® Technology to control the shape, velocity and thermal dynamics of water, creating the luxurious feeling of a high-flow shower, using only a fraction of the water. An ideal shower experience is one that is both relaxing and kind to the environment — the epitome of luxury in the bathroom.

5 things you should check your HVAC system for, before it gets cold

2022-11-12T05:15:00

(BPT) – As temperatures start dropping, now is the perfect time to make sure your home will be comfy and cozy all winter. Fortunately, there are steps you can take to make sure your heating system is in good working condition to get you through those chilly winter months — and potentially save on energy bills, too. The best time to do this is early in the season, before everyone else is in a rush to repair or upgrade their HVAC systems.

Even if it’s not cold yet, turn up your thermostat to see how your system is working. Does the heat turn on quickly, and are you feeling warm air coming through the vents? If your furnace has trouble getting started or the air flow seems weak, you could be behind on maintenance — or you may need to upgrade your system.

Here are tips for maintaining your HVAC system, along with action steps to keep everything in good running order.

1. Schedule a tune-up

Having a professional HVAC technician visit at least once a year for a furnace cleaning and tune-up is important for proper maintenance. Scheduling this appointment early in the season is a good idea, as techs get very busy after the first deep freeze happens. An experienced technician will clean all the components and make sure everything is working as it should and can alert you to potential problems before they grow into safety hazards.

2. Change the furnace filter

A dirty furnace filter interferes with how efficiently your heating works — increasing energy costs, while also making your home’s air less clean and comfortable. How often you should change your furnace filter depends on its size, so check the manufacturer recommendations. You can also change a furnace filter more frequently than recommended for maximum comfort, especially when your furnace is under heavy use, you have pets or if you have a family member prone to allergies.

Pro tip: Set calendar reminders on your phone for changing your filter regularly so you won’t forget.

3. Upgrade your thermostat

If your thermostat is older, it may be a good idea to upgrade to a more energy-efficient or smart thermostat. Besides allowing for control when away from home, newer thermostats are better at regulating your HVAC system, keeping your entire system running more smoothly, which can make your home more comfortable and save on energy costs.

4. Consider a replacement

If your HVAC system is old or not functioning well, replacing it with a newer model can offer many benefits, including a much warmer home in the winter as well as savings on energy bills. Ask your HVAC technician what shape your furnace is in, and whether there are any signs that it needs to be repaired or replaced.

5. Check the concrete pad

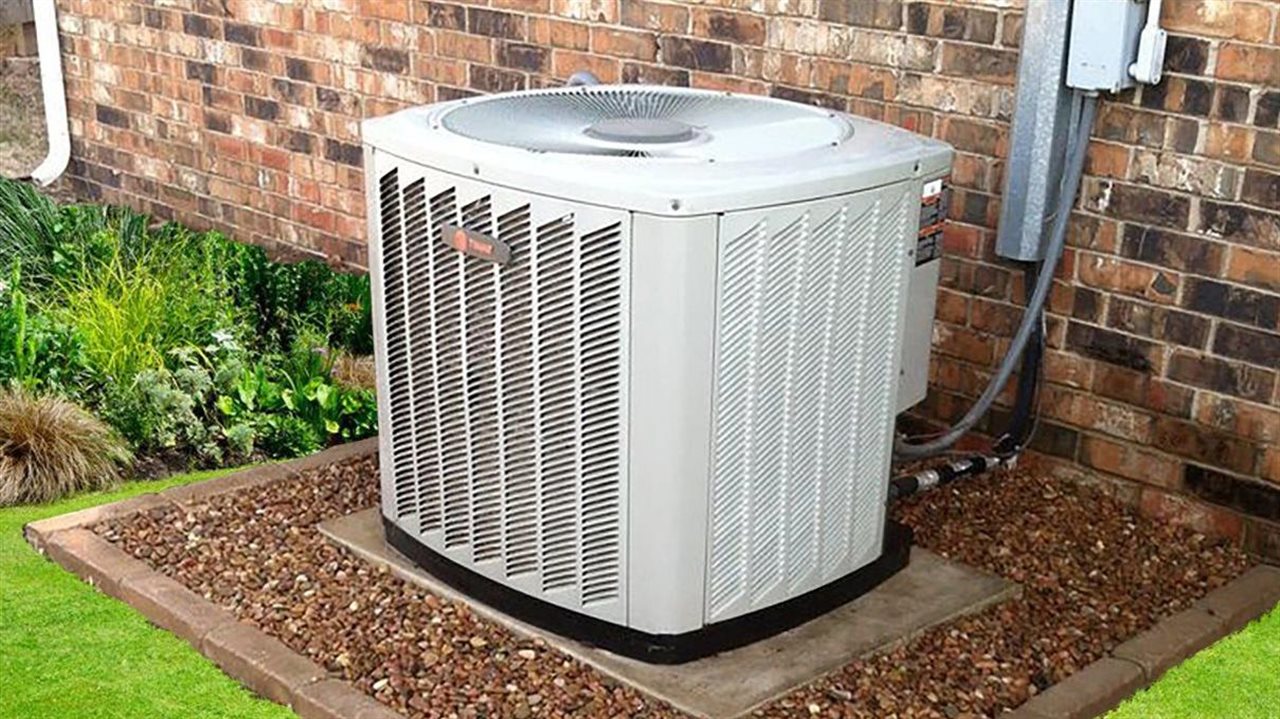
Both to work more efficiently and to be safer from potential minor flooding, your outdoor condensing unit should be placed on a level concrete pad. If you have a level, you can easily check the slab that your condensing unit currently sits on. If it’s an old concrete pad that’s in rough shape or it’s not level, this is something that should be corrected, whether or not you are replacing your HVAC system.

When you’re ready to replace your condenser, one simple way to save money is to install the concrete pad yourself. This can be easily accomplished by using four 24″x24″ square concrete stones from Pavestone, along with paver sand, to do the job. Pavestone concrete stones provide a quick and easy solution to creating a solid, level foundation for your HVAC system, and does not require expertise to install. You can find easy-to-follow instructions on the product itself, and the process is similar to the video for how to install patio stones on the Pavestone website.

Following these steps, your home can be prepared now, before winter gets well underway. Starting early means you’ll have less time to wait for service, and you can also find better prices on system maintenance or the purchase of a new HVAC system before the winter rush.

How you can elevate your outdoor entertaining space this fall

2022-11-12T04:01:00

(BPT) – Autumn is a magical time of year, with cooler temperatures and colorful, changing leaves. Depending on where you live, it may still be warm enough to enjoy entertaining friends and family outside throughout much of the season. However, if it’s not so warm where you live, there are other solutions that create easy and affordable ways to elevate your outdoor space.

Here are some ways you can optimize and enhance your outdoor space this fall, even if you’re new to DIY.

Consider how you want to use the space

Are you looking to create an intimate setting for small gatherings, or do you want a larger area to host big get-togethers? Or would you just like to section off a specific spot for relaxing outdoors or playing games on family night? If you don’t yet have a patio or you want to expand your existing patio space, first map out how large of an area you’d like to designate for entertaining, to help add square footage to your home and to make more room for amenities such as outdoor furniture, games, a fire feature or a grill.

To build your patio, consider easy-to-use, stylish and attractive paving stone options such as 16”x16” Avant Patio Stones, which have the look of those ever popular large format linear pavers, and are available in the sleek and modern blended gray color. One big advantage is that these patio stones are far easier and much less expensive to install than individual large format pavers. They also come in six different face textures that are strategically packaged on the pallet, so that installing your outdoor surface in an eye-catching modern design is easy to do. Avant Patio Stones are made of durable concrete that does not attract pests, and they are also resistant to decay and fading. You can find videos and detailed instruction guides showing just how easy it is to install Avant Patio Stones as well as to complete similar outdoor projects at Pavestone.com/resources.

Once you’ve created your space for outdoor entertaining, you’re ready to further enhance your design with a visual focal point.

Create a stunning focal point

Whether you want to host large or small gatherings, it’s always ideal to have an obvious gathering point for conversation, and to add visual interest or even warmth to the area. Focal points are also the perfect way to draw in natural elements to enhance the space and can include anything from a fire pit or water feature to a large planter or living wall full of greenery.

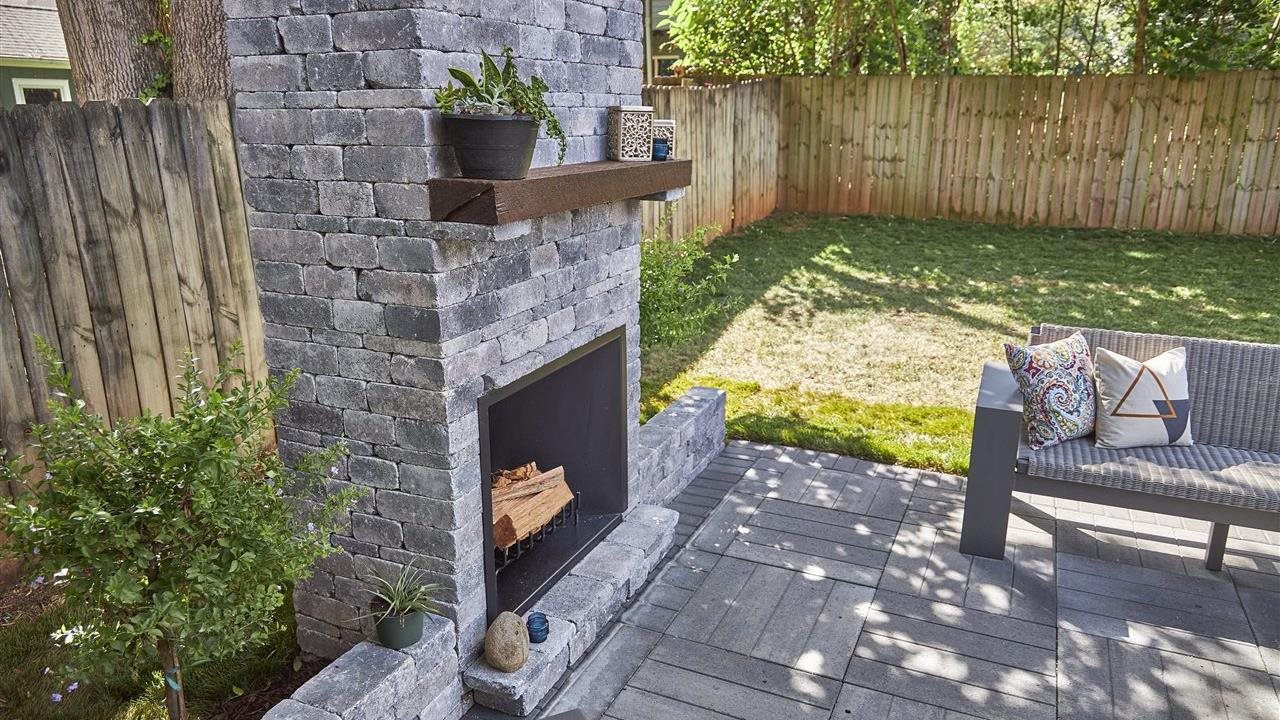
Fire pits are tried and true, staying highly popular because of the variety of options available to build them as well as the sheer beauty, enjoyment and warmth they create. And fortunately for those who are newer to DIY, they can be very easy projects to tackle in as little as a single weekend.

The RumbleStone® system includes a set of rustic “building blocks” that can be assembled for a variety of outdoor hardscape projects, including fire pits or fireplaces. Their weathered appearance creates a natural look and feel, adding pleasing texture and depth. You can easily construct a fire pit using a RumbleStone fire pit kit, packaged with detailed instructions allowing for very easy assembly — making it possible to complete your fire pit in as little as one day. RumbleStone building blocks are available in tan and gray options that you can order online from your favorite home improvement store website, to be conveniently delivered curbside. Review this webpage to explore some of the possibilities using RumbleStone kits.

Even if you’re a novice DIYer, you could take on one or both of these satisfying home improvement projects over a weekend or two, depending on the size of the area you’re transforming, to create a truly magical outdoor space.

Looking for more design inspiration for your patio, yard or garden? Visit Pavestone.com.

5 Tips on How to Engineer Your Home for Living

2022-11-10T09:01:00

(BPT) – Showcasing your personal style doesn’t have to be limited to the clothes you wear. Now more than ever, people are using their homes as a blank canvas to make a style statement. But that doesn’t mean you have to sacrifice function for fashion. Here are five tips for unleashing your design personality while still ensuring your home is engineered for everyday living.

1. Make an Entry Statement

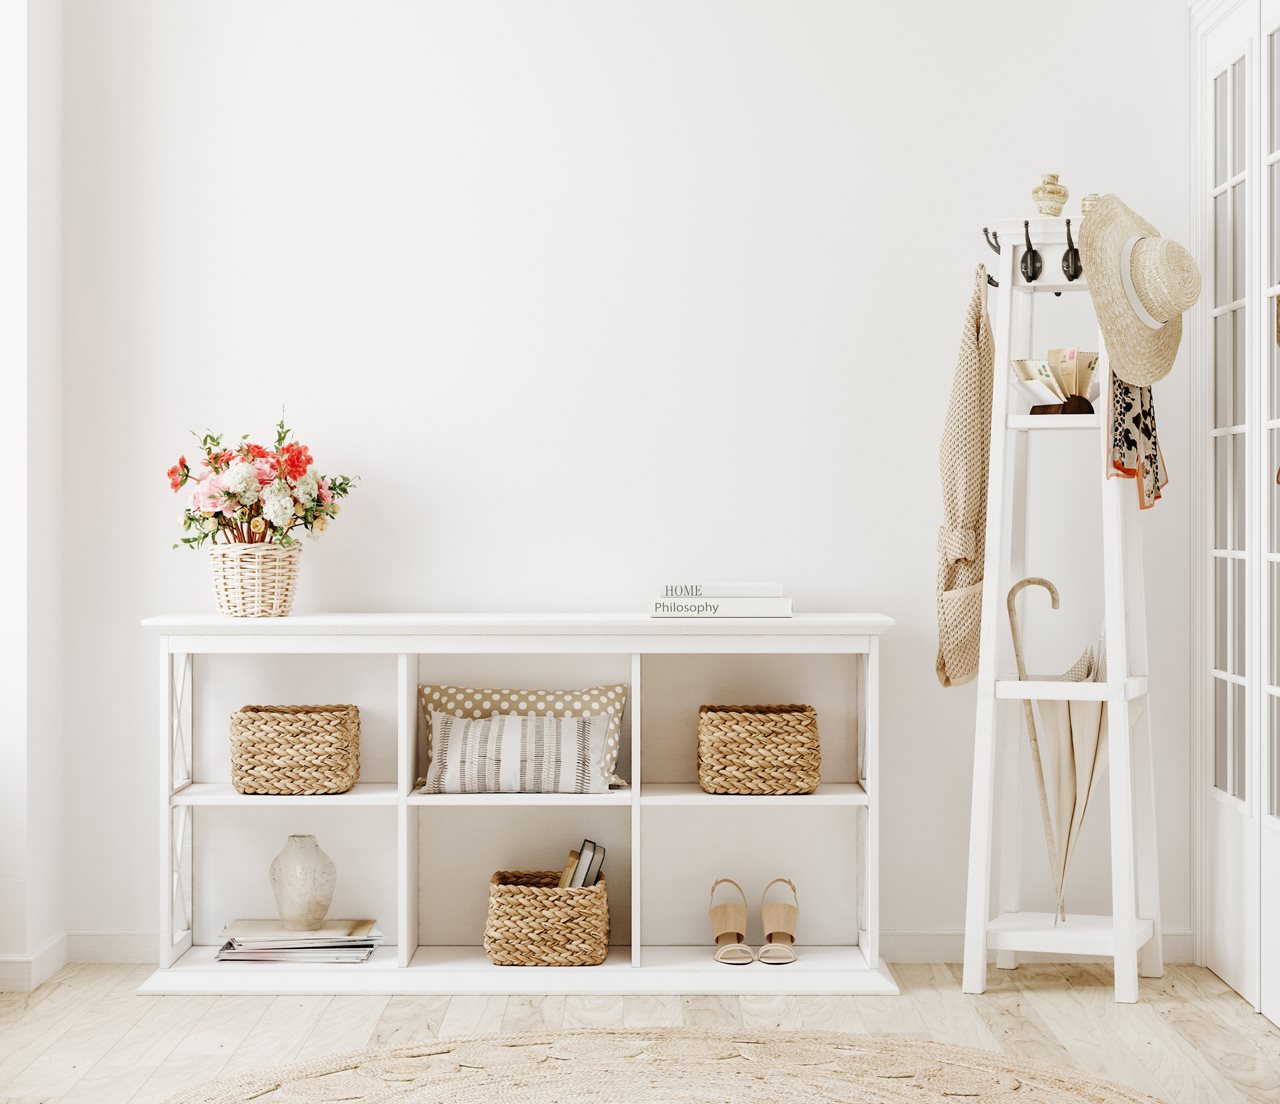
Whether you’re greeting guests or coming home after a long day at work, your entryway establishes the welcoming tone of your home. As our homes have become more multi-functional than ever, consider incorporating stylish storage solutions like coat racks, cubbies or benches that allow you to add touches of personal style while creating a space that’s also useful.

2. Put Your Kitchen Countertop to Work

From cooking and entertaining to schoolwork and crafting, the kitchen island or countertop is the center of many activities in the home. As the focal point of any kitchen, selecting a countertop that is both on trend and able to withstand everyday rigors is of the utmost importance. Wilsonart® helps homeowners make a style statement with a variety of engineered surfaces in today’s most sought-after natural marble and stone looks. From Quartz and Solid Surface to High Pressure Laminate (HPL), these surfaces are also engineered to meet a variety of lifestyle and budget needs while also withstanding daily wear and tear. They are high-performance, non-porous, meaning it will hold up against stains and look better, longer, and are as sustainable and sanitary as they are stylish. As each of these is a hard surface, they are inherently protected and inhibit the growth of bacteria, mold and mildew to keep the surfaces looking and smelling better, lasting longer, and mimic the best of Mother Nature, without impacting the environment.

3. Don’t Let High-Touch Surfaces Cramp Your Style

Homeowners are always looking for ways to mask the unsightly fingerprints that happen to surfaces of the home. Wilsonart® Traceless™ Laminate is ideal for use on high-touch areas with its nature-inspired tones and ultra-matte finish that provide an organic and sophisticated, luxurious look and feel for cabinets, doors and countertops. This innovative surface option features fingerprint-resistant technology engineered to repel prints, smudges, smears, and streaks in high-traffic areas. It’s stain-resistant, remarkably durable, repairable if light scratches occur, and easy to clean, making it the perfect upgrade from traditional paint.

4. Let the Inside Shine

Opening a cabinet door to find a stark white interior, or a dark abyss that makes it difficult to see what’s inside, adds nothing to a kitchen’s personality. Wouldn’t you rather open the door to spaces that are as beautiful as they are functional? Bring sophisticated style to the inside of cabinets, drawers, and open storage areas with Wilsonart® Interiors, a collection of Thermally Fused Laminate (TFL) designs and finishes. Inspired by natural woven textures, the collection adds a sense of refinement to both open and closed cabinet storage, dressing spaces from the inside-out with a new level of detail.

5. Accessorize!

Deciding on décor is a balancing act. Overloading a space can create an unwanted cluttered feeling. Instead, mindfully choose decorative accessories that will let your personality shine. Then create a perfect blend between practical storage and pleasing aesthetics with shelving. Whether decorated with books, family photos or plants, shelving lets your personal items become décor, instead of distractions.

For more stylish yet functional design inspiration, visit www.wilsonart.com.

5 tips for getting ready to buy your first home

2022-11-10T07:01:00

(BPT) – By AmeriSave Mortgage Corp.

For generations, homeownership has been synonymous with the idea of achieving the American Dream. This has certainly been true for many Hispanic Americans, who have used their homes to establish roots in their communities for their families.

More than 8.8 million Latino families now own homes across the U.S., according to a recent report from the National Association of Hispanic Real Estate Professionals. The Latino homeownership rate is now more than 48%, a number that has been on the rise for the last several years.

Homebuying experts say that many more Latinos are interested in buying homes but have pushed off the decision because they’re unsure if they can afford it or because they would like more education about the process.

AmeriSave Mortgage Corp., one of the nation’s fastest-growing home loan providers, offers the following five tips for first-time homebuyers.

1.) Understand what your legal residency status enables you to do. You’re not required to be a U.S. citizen to qualify for a home loan. Anyone with permanent status — including certain non-U.S. citizen buyers — is eligible for a home loan. The best resource to determine what you can do is the comprehensive guide published by Fannie Mae.

2.) Calculate what you can afford. The amount you can borrow is determined primarily by your monthly income and credit score. Typically, people with higher incomes and credit scores can borrow more than those with lower incomes and lower credit scores. Online calculators can provide a general estimate of how much home you can afford and help you estimate your potential monthly mortgage payment. Not sure of your credit score? You can use a service like Experian, Equifax or TransUnion to learn where you stand.

3.) Report verifiable income. Any income you report to a lender must be verifiable taxable income. Cash income is not considered part of your earnings, so if you’re being paid by an employer in cash, you should ask to be paid via their payroll system, either in the form of a physical check or direct deposit. Similarly, if a large portion of your income comes from cash tips, talk with your employer about ensuring those tips are appropriately reflected on your W2.

4.) Don’t forget about the down payment. Regardless of how much you plan to borrow, you’ll need to set aside funds for a down payment and closing costs. Most lenders require 3% to 5% of the total purchase price, at minimum. Any funds you use for this purpose must be in a bank account for at least 60 days prior to underwriting, so make sure you deposit any cash that you receive from working side jobs, from gifts, etc., before starting the mortgage process. Many cities and counties across the U.S. also offer down payment assistance programs, which are intended to help first-time homeowners. Research these programs online as a first step.

5.) Do your research and partner with a qualified and experienced loan originator. Purchasing a home is the biggest financial decision most people will ever make, so it’s important to have trust in and be comfortable with your mortgage lender. You can verify your lender is authorized to do business in your state through the free NMLS® (Nationwide Multistate Licensing System) Consumer AccessSM page. If English is not your preferred language, many mortgage lenders, including AmeriSave Mortgage, have Spanish-speaking loan originators who can guide you through the entire process and provide forms you can complete in Spanish.

The prospect of buying a home can be daunting. But a qualified, experienced lender can make the process much simpler and less stressful. For more information, visit www.AmeriSave.com.

5 tips for building an online profile to land a skilled trades job

2022-11-09T12:01:00

(BPT) – Across the U.S., there is a strong, growing need for highly skilled tradespeople. According to the Home Builders Institute, more than 300,000 skilled labor job openings remain unfilled. There are many reasons for this labor shortage, but one that doesn’t get enough attention is the lack of networking opportunities between hiring trades professionals and skilled tradespeople.

According to The Home Depot’s Pro Consumer Insights study, 94% of trades professionals struggle to find skilled workers. Unlike other professions, skilled trade workers looking to hire use word-of-mouth referrals as their primary or only recruitment method. Without a jobseeker platform to connect skilled tradespeople, many positions remain unfilled.

To help fill this gap, The Home Depot launched the Path to Pro Network, a new, unique jobseeker marketplace and platform focused on the skilled trades. This free platform allows candidates to connect with The Home Depot’s Pro customers looking to hire in their local area. Candidates can also apply directly to job postings that interest them.

“Connections are a tradesperson’s most powerful tool,” said Jenna Arca, Director of Workforce Development at The Home Depot. “Whether you’re entering the skilled trades for the first time, refreshing your talents or expanding on your skillset, the Path to Pro Network provides a free platform to showcase your trades experience and make connections with hiring Pros in need of skilled labor.”

Before you can make connections and apply for jobs to advance your career, you’ll need to create a strong profile that will make you stand out to potential employers. If you’re new to making a profile or resume, check out these five profile-building tips.

1. Pick your best work

When it comes to skilled trades, no project is too small to show off your mastery of the craft. However, hiring professionals are pressed for time. They need to be able to quickly assess if you’re the right person for the job.

Write a list of the jobs you’ve done and pick only the best ones that highlight your skills and experience. Make sure that the jobs you pick relate to the skilled trade job you’re hoping to land. Also, ensure the skillsets you include in your portfolio demonstrate familiarity with your desired trades job.

2. Take photos of your projects

You’ve probably heard that a picture is worth a thousand words. Hiring Pros need to see that you can produce quality craftsmanship when they are looking to hire a skilled professional for their team. The easiest and more impactful way to show your skill is to take and upload high-resolution photos to your profile.

During a job, take photos before, during and after to show key stages of your process. You don’t need an entire photo album worth of images. Generally, 3-5 photos of each project highlighting the details of your handiwork will be enough to show hiring Pros what you can do.

3. Describe your job process

Make sure to accompany your photos with descriptions of the steps and stages of each project. These descriptions give potential employers confidence in your ability to plan and execute your work.

You don’t need to write a novel. Keep it simple, short and clear. If you completed a project as part of a larger team, highlight your specific contributions, including examples of when you suggested a solution or collaborated with team members to solve a problem.

4. Sell yourself

At the end of the day, potential employers need to know who you are and that you have what it takes to work in the skilled trades. Make sure you have a profile photo that shows off your smile and personality. A photo helps you stand out in the crowd and adds a human touch to your profile.

The Path to Pro Network also features skill badges that indicate if you have accredited training, are a U.S. Military Veteran, or have graduated from The Home Depot’s free trades training program.

Lastly, don’t skip the “About Me” section. This short description gives hiring Pros a little more information about you before they read your work experience and skills. It doesn’t have to be long or super detailed. Make sure to touch on your current position or title, relevant skills and career goals. This short description gives Pros a quick snapshot of how you sell yourself professionally and if you’re a good fit for their needs.

5. Get connected and land your next job

Are you ready to get connected with Pros and land a job? Visit PathtoPro.com/FindJobs to create your own profile and access the Path to Pro Network, where you can find a job and explore new career opportunities. If you want to expand your existing skill set and get resume and interview assistance, you can also enroll in the Path to Pro Skills Program.

5 fabulous hardwood kitchens

2022-11-08T12:01:00

(BPT) – Who doesn’t want a kitchen that’s well-designed and hard-wearing but also looks beautiful and welcoming? There is one material — hardwood — that incorporates all these qualities. “Professional kitchen designers love working with Real American Hardwood™ products because they’re adaptable and durable, answering all their practical and aesthetic needs,” says Linda Jovanovich of the American Hardwood Information Center. “Homeowners respond to the natural warmth of oak, maple, walnut and other classic species, which adds character and personality to any kitchen, whether traditional or contemporary in style.” Here are five kitchens that prove Linda’s point.

Photo Courtesy Trent Bell

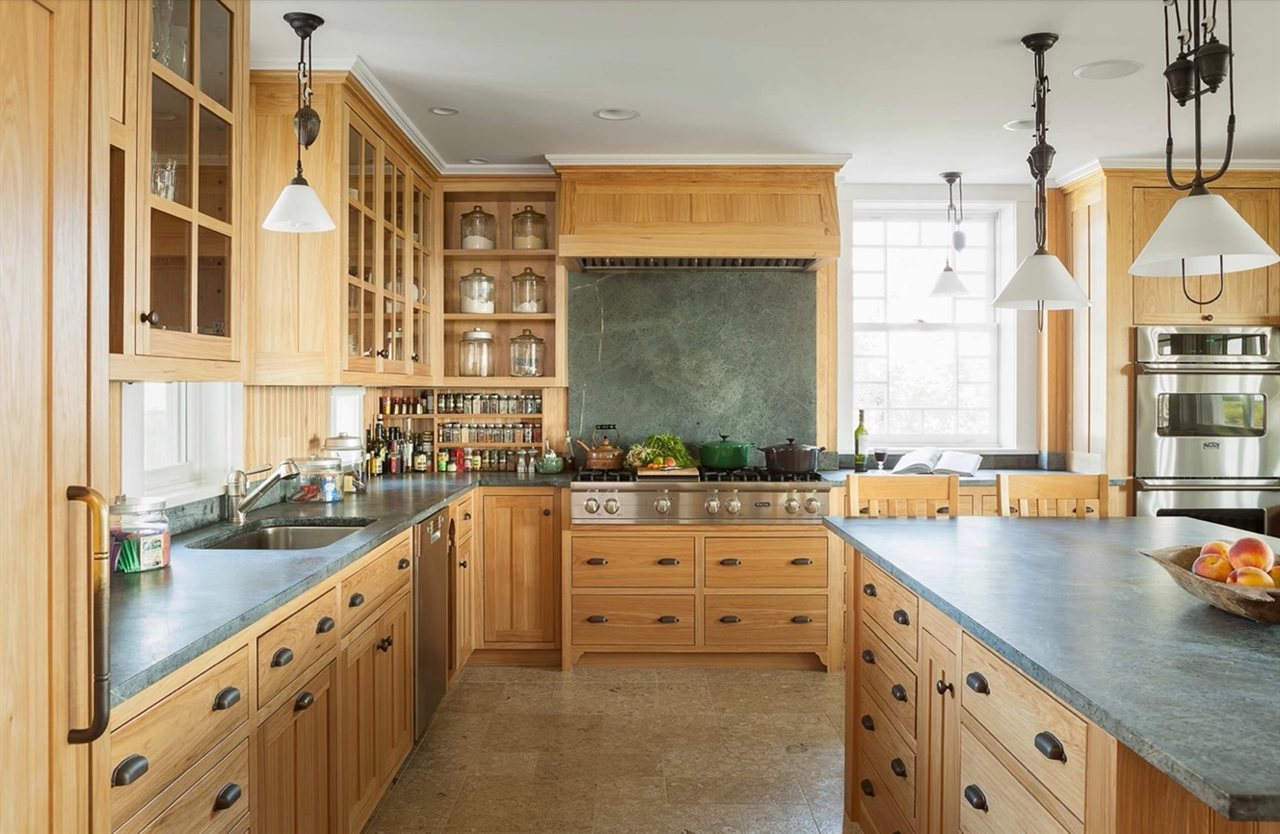
This traditional kitchen by Whitten Architects (@whittenarchitects) in Portland, Maine, showcases two strong contemporary design trends: all-hardwood cabinetry and the use of natural or light-hued finishes. Here, a colorless stain was applied to the handsome hickory millwork, giving the wood a tawny glow that’s a perfect complement to the cool green of the soapstone counters and backsplashes.

Photo Courtesy Jimmy Cheng

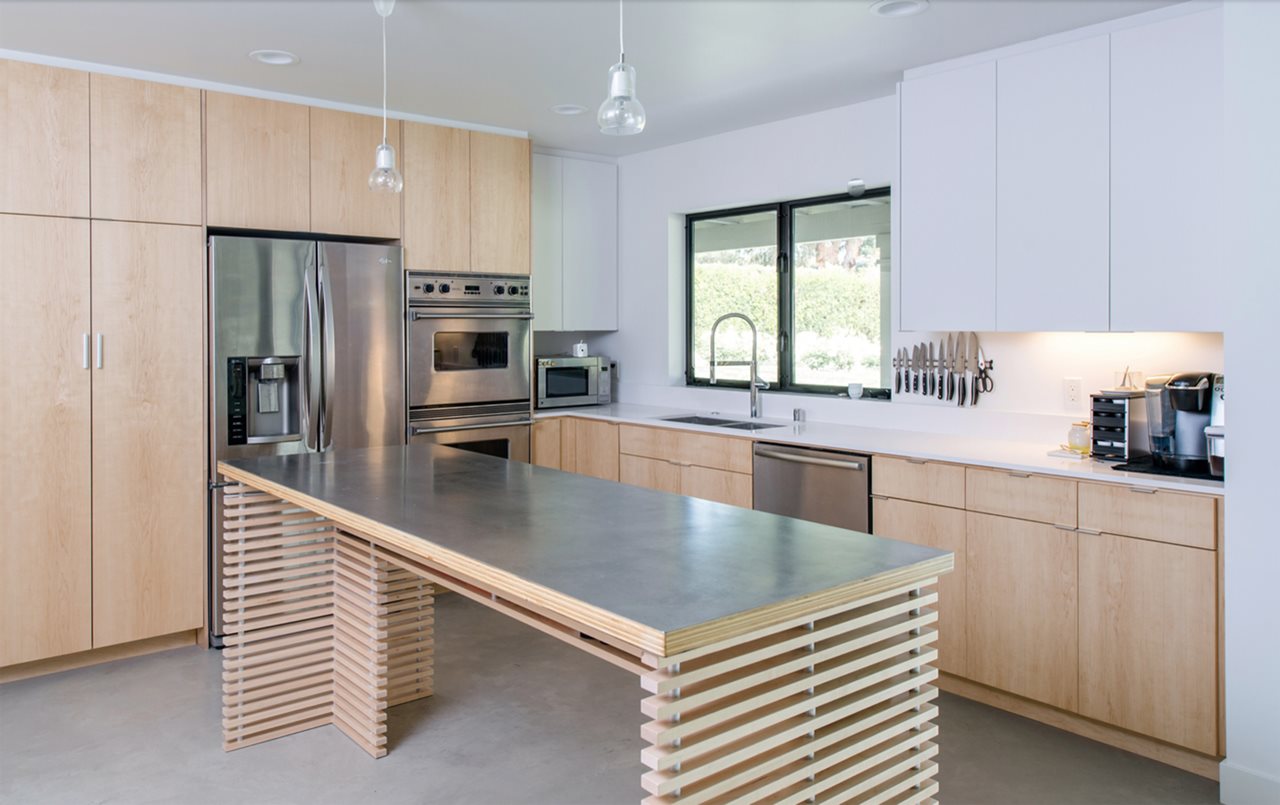
Hardwood works just as well in modern, minimalist kitchens as it does in more traditional ones. MYD Studio (@mydstudio) gets maximum impact out of clean-lined maple cabinetry by surrounding it with a limited number of materials — stainless-steel appliances, quartz countertops, white-painted walls — in this remodeled Orange County, California, kitchen. And thanks to the clever use of wood slats, the large custom island looks as light and airy as the rest of the space.

Photo courtesy Alexander Stolz

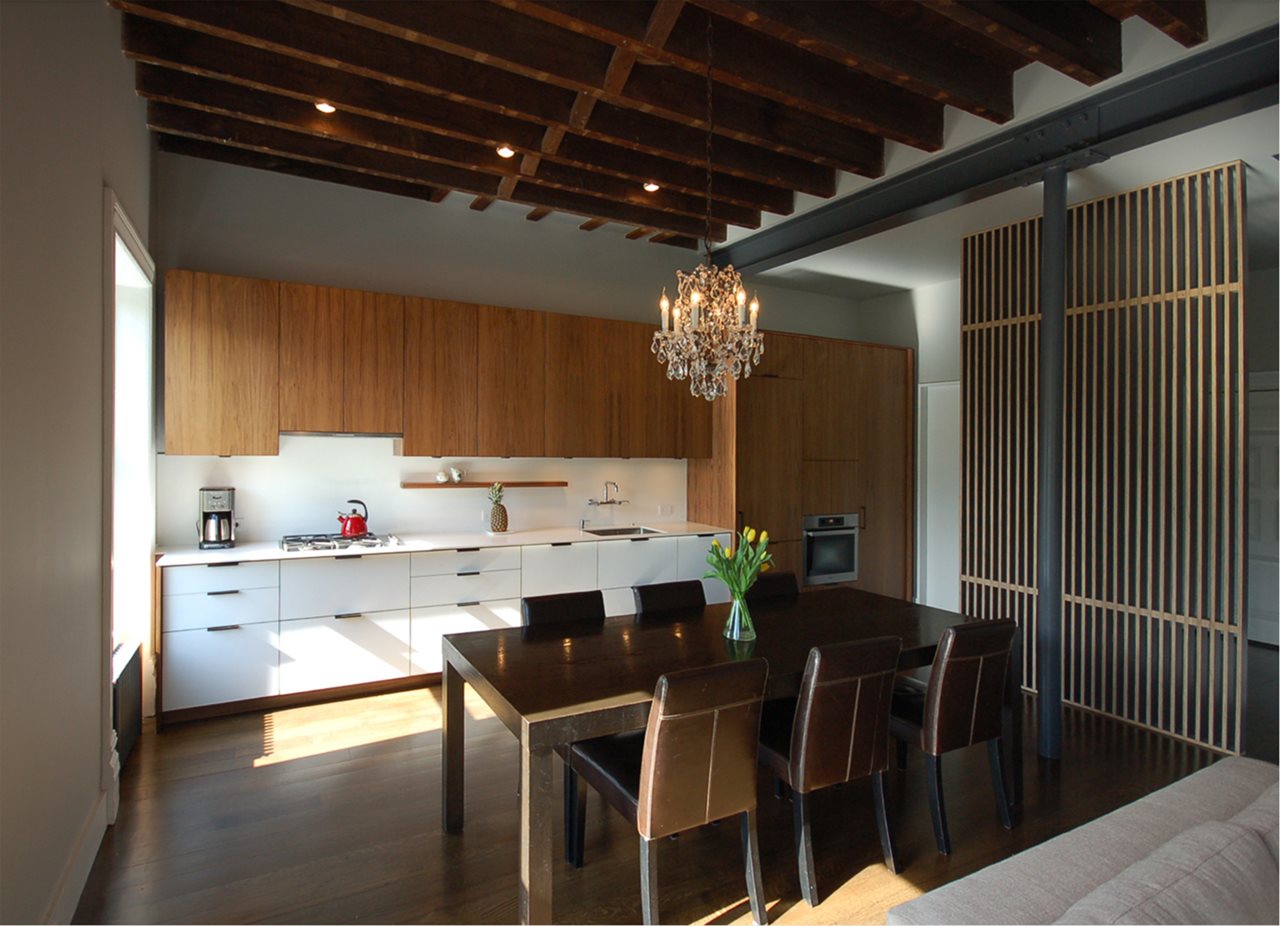
SA-DA Architecture installed this simple but elegant one-wall kitchen in the great room of a turn-of-the-century mansion they renovated in Brooklyn, New York. The flat-panel walnut cabinets strike a discreetly modern note while integrating smoothly into the imposing space, which features original exposed joists and new oak floors. Aesthetically, the white undercounter cabinets form a solid compositional block that’s pleasingly substantial without being overbearing.

Photo courtesy Hugo Landa

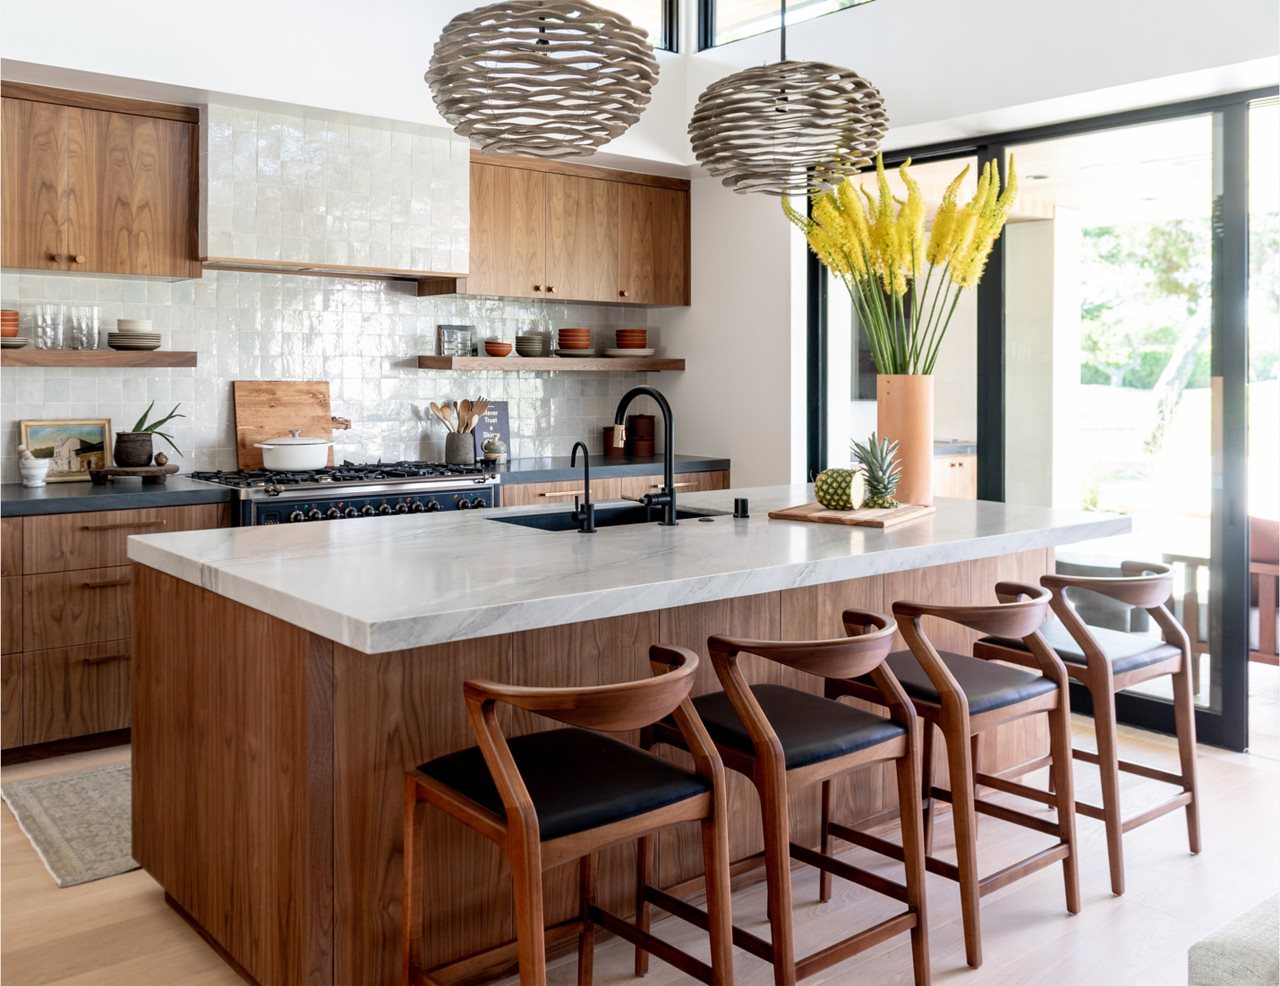
In the kitchen of an Orange County, California, house by Gonterman Custom Homes, designer Laura Brophy (@laurabrophyinteriors) sets up a Mediterranean vibe by juxtaposing clear-stained, solid-walnut cabinets and open shelving with elements in different shades of gray: dark charcoal for the granite countertops; subtle smoky striations for the island’s marble slab; and palest mist for the glossy backsplash tile. It’s a winning recipe that’s both sophisticated and easy.

Photo courtesy Kim Smith

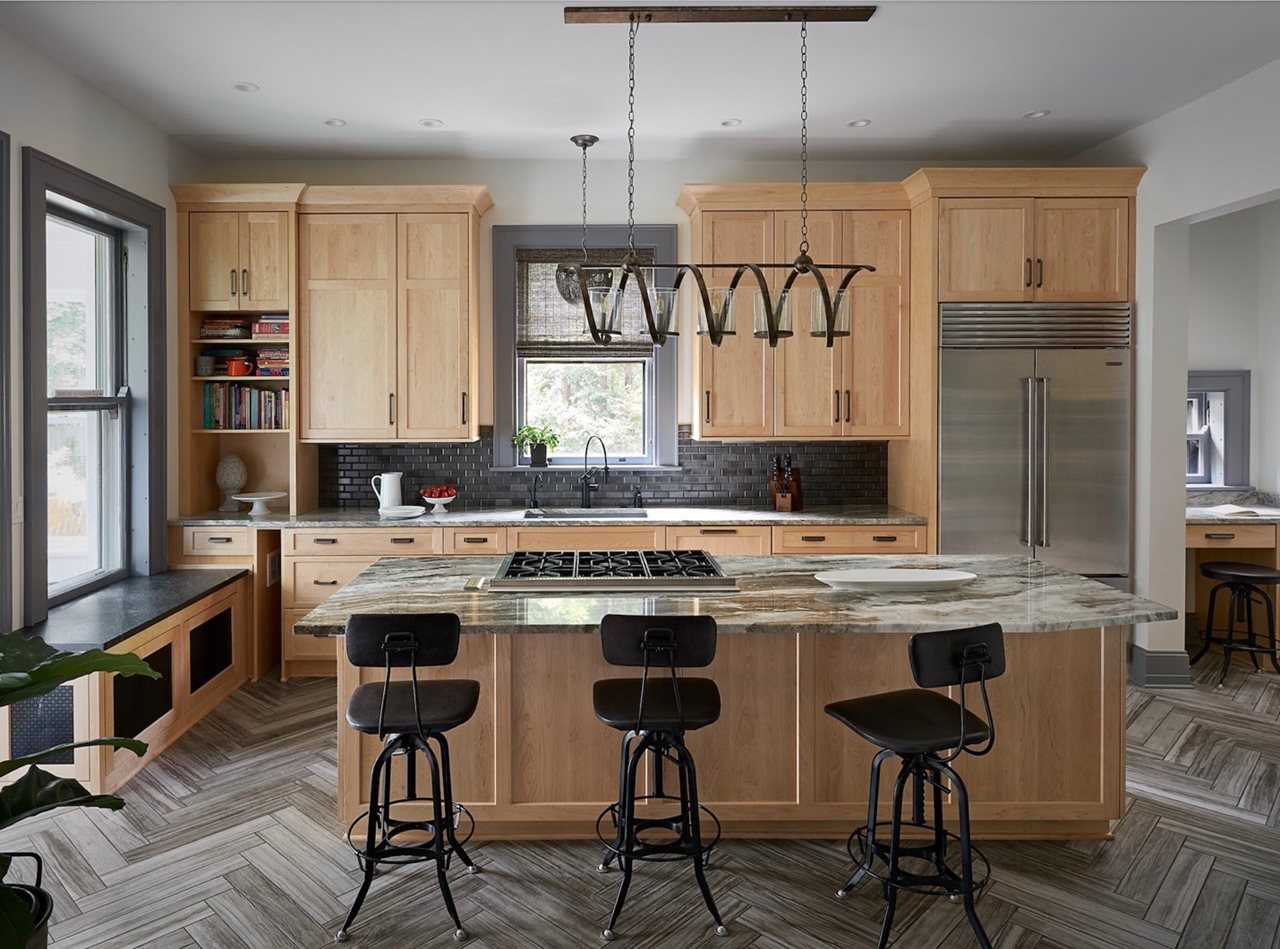
Shaker style gets a masterful update with the custom maple cabinetry in this Buffalo, New York, kitchen designed by Julie Deuble of Sierra Unlimited Construction. No stain color was applied to the wood, so its natural beauty shines through, while its light hue and fine texture are counterbalanced by the darker shades of the glossy tile backsplash, the polished Fantasy Brown granite countertops, and the gleaming stainless-steel appliances.

Visit www.hardwoodinfo.com for more about using American hardwoods in the kitchen.

Be water wise in 2023 with smart home improvement ideas

2022-11-07T06:01:00

(BPT) – Everyone agrees that water is an important resource, and with the ongoing megadrought paired with increasing costs of water in many cities across the country, water consumption is increasingly top of mind. More people are questioning their daily water use and looking for strategic ways to save at home.

Considering only about 1% of Earth’s water is available for human use, it’s important that everyone take steps to reduce their water use through smart home improvements. Here are three ways you can make a difference and save money:

1. Understand your water footprint

The first step is to understand how much water you’re using. Start by paying attention to your water bill. How much water are you using and how does that compare to months and years past? Some utilities even provide insight into your use compared to your neighbors’, which can be helpful in seeing if you’re above or below average.

Additionally, consider insightful upgrades like the Kohler H2Wise systems that provide key insight into how much water your home uses every day. Plus, this smart system provides 24/7 monitoring that sends real-time alerts to your phone if it detects changes in water pressure that signal potential water leakage or other plumbing problems, so you save wasted water, not to mention, prevent potential home damage.

Each American uses an average of 82 gallons of water a day at home, according to the U.S. Environmental Protection Agency. You can lower your water footprint by being aware of your water usage and making several strategic home improvements.

2. Look for labels

The average family spends more than $1,000 per year in water costs, but can save more than $380 annually from retrofitting with WaterSense labeled fixtures and ENERGY STAR certified appliances, according to the EPA. That means if you’re making home improvements, it’s important to look at the labels of products and choose wisely.

The EPA has recently recognized Kohler Co. with a 2022 WaterSense Sustained Excellence Award for its continual efforts to innovate water-efficient plumbing products, promote water conservation and aid in the protection of this natural resource. This award is the company’s 8th Sustained Excellence recognition and its 13th year of recognition overall by the WaterSense program.

By looking for this label and using these products, you can be part of a movement that’s making a big impact on water conservation. Since 2007, cumulative savings due to Kohler brands is over 437 billion gallons of water, 9.26 million metric tons of avoided CO2 emissions and $7 billion in energy and water costs.

3. Make strategic upgrades

Many people are looking for ways to green their home with eco-friendly upgrades. Replacing old toilets and faucets with WaterSense options reduces water use and saves money, especially since these things are used on a daily basis. When it’s time to replace washing machines and dishwashers, remember to keep water conservation in mind as well when selecting updated appliances.

Swapping out your showerhead is another option to help you gain control while saving money. Go a step further with the innovative Anthem digital control that has a sleek, minimalist display that lets you control your outlets, temperature and water flow. Optional built-in eco mode lets you conserve water by using just one outlet at a time, and the summary screen helps to promote mindful water usage.

Finally, research if a tankless water heater might be right for your home. Rather than a holding tank, these units heat water on demand, therefore eliminating the long waits between when you turn on the water and when you actually get hot water flowing, which can equate to gallons of wasted water down the drain.

The EPA states everyone can use at least 20% less water by installing water-efficient fixtures and appliances. Pair this with being thoughtful about your water use every day and your entire family will help conserve this precious resource.